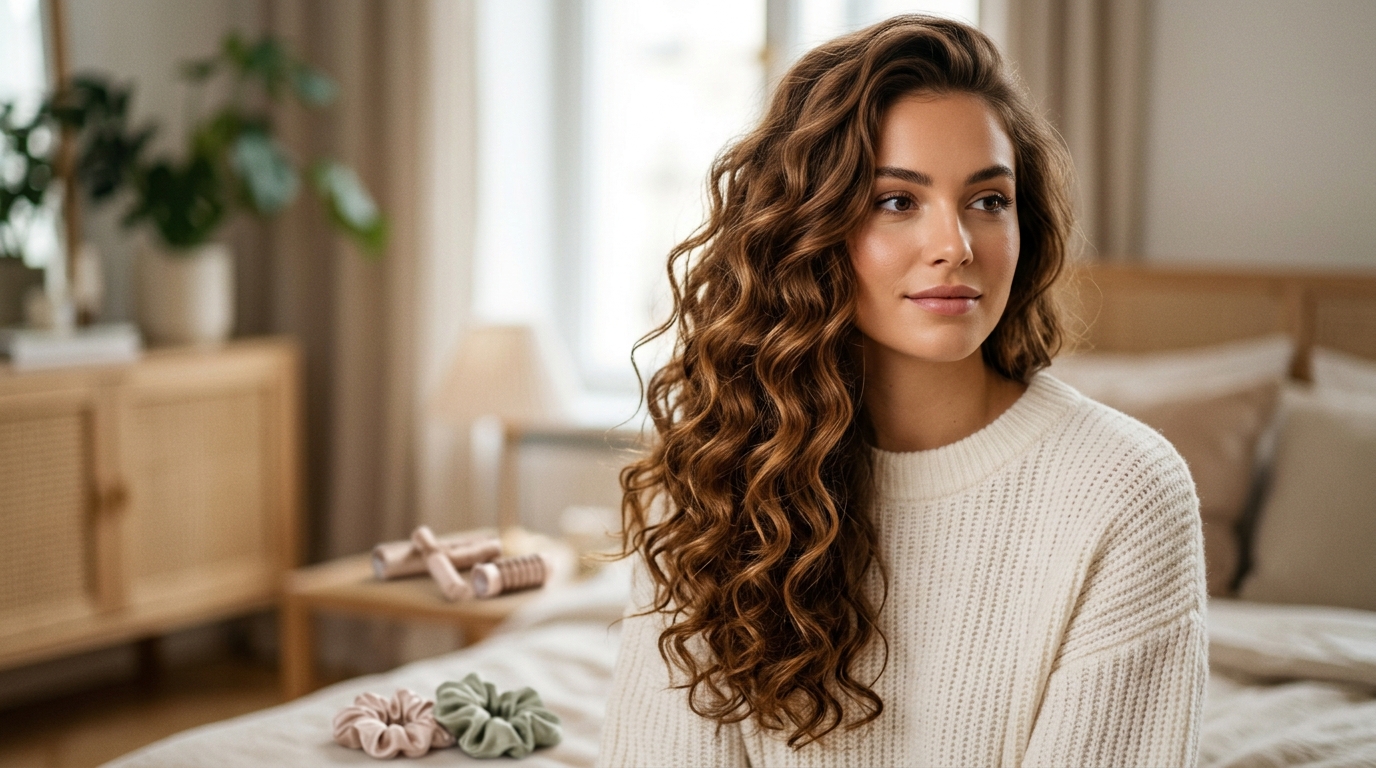
The Ultimate Guide to Heatless Curls: How to Get Gorgeous Waves Overnight
Imagine waking up, rolling out of bed, and unraveling a halo of bouncy, glossy, red-carpet-ready waves without ever touching a sizzling wand. Sounds like a total fever dream, right? For years, we’ve been conditioned to believe that gorgeous styling requires us to bake our hair at 400 degrees. But let’s be honest: your poor, split ends are practically begging for a break. Welcome to the glorious era of heatless curls—the ultimate beauty cheat code that lets you sleep your way to perfect hair.
In this comprehensive guide, we are going to dive deep into the world of heatless styling. Whether you have pin-straight strands that refuse to hold a bend or unruly waves that need some direction, there is a heatless method out there with your name on it. Let’s ditch the heat damage, save precious morning time, and unlock effortless, overnight waves that actually last.
Why We’re Ditching the Curling Iron in 2026
Let’s be real: our hair has been through a lot over the years. Between chemical treatments, daily pollution, and the constant hiss of flat irons, our strands are often screaming for mercy. This year, the collective beauty community has officially embraced the "skinification" of hair care. We aren't just styling our hair anymore; we’re actively nurturing it. Stepping away from hot tools isn't just a fleeting trend—it’s a lifestyle shift.
By skipping the heat, you preserve your hair's natural moisture barrier, prevent those annoying micro-frizz flyaways, and stop split ends before they even start. Think of it as a long-term investment in your hair's health. Plus, think of the time you will save in the morning! Instead of spending thirty sweaty minutes over a hot iron, you get to hit the snooze button, sip your coffee, and simply shake out your gorgeous, ready-to-go waves. It’s a win-win for your sleep schedule and your hair health.
The Science of Styling: How Heatless Curls Actually Work
How on earth does hair transform from stick-straight to beautifully spiraled without a single watt of electricity? It feels a bit like magic, but it’s actually pure physics. Your hair is made of keratin proteins held together by different types of structural bonds.
Hydrogen Bonds: The Secret to Temporary Shape
The secret weapon of heatless styling is the hydrogen bond. These bonds are incredibly weak but highly plentiful in your hair. They break easily when your hair gets wet and reform into whatever shape your hair dries in. When you wrap damp hair around a roller, a sock, or a silk ribbon, you are physically forcing those hydrogen bonds to reform in a curved pattern as the water evaporates.
This is different from hot tools, which rely on breaking stronger disulfide bonds with high temperatures. By utilizing hydrogen bonds instead, you get all of the bounce with zero of the structural damage.
The Role of Moisture and Drying Time
Because heatless styling relies entirely on water evaporation, timing is absolutely everything. If you take your hair down while it is even 5% damp, those hydrogen bonds will instantly collapse back into their natural, flat state.
Patience is your best friend here. Your hair needs to dry completely while wrapped to lock that new shape into place. Think of it like baking bread—if you take it out of the oven too early, the middle collapses. Give your hair the time it needs to set.
Preparing Your Canvas: Pre-Styling Prep for Maximum Hold
You wouldn't paint a masterpiece on a dirty, unprepared canvas, right? The same logic applies to your hair. Getting your prep work right is the difference between gorgeous waves that last all weekend and curls that deflate before you even leave the driveway.
Choosing the Right Dampness Level
The goldilocks zone for heatless styling is "barely damp." If your hair is soaking wet, it will never dry overnight, leaving you with cold, soggy strands in the morning. If it’s bone dry, the hydrogen bonds won't reset, and you’ll wake up looking exactly the same.
Aim for about 80% to 90% dry. If you’ve just washed your hair, rough-dry it with a microfiber towel or a quick blast of cool air first. If you’re styling dry hair, lightly mist it with a water spray bottle until it feels cool to the touch, but not wet.
Must-Have Products for Heatless Waves
To make your curls look polished and stay put, you need a little product backup. Choosing the right formulas will keep your waves looking defined rather than frizzy.
Leave-In Conditioners and Serums
A lightweight leave-in conditioner or a tiny drop of hair oil is essential to smooth down the cuticle. This prevents that rough, frizzy texture that can sometimes happen when hair rubs against fabric overnight. Keep the product focused on your mid-lengths to ends so you don't weigh down your roots.
Mousses and Setting Sprays
If your hair is notoriously straight and struggles to hold a curl, styling mousse is your holy grail. Work a golf-ball-sized amount of mousse through your damp hair before wrapping. For fine hair, a light spritz of setting spray or sea salt spray will give your strands the "grip" they need to hold the shape all day long.
Method 1: The Viral Silk Ribbon (The Robe Tie Technique)
If you've spent any time on social media recently, you’ve definitely seen the silk curling ribbon. It looks like a long, padded pool noodle, and it has completely revolutionized the overnight hair game. It is incredibly gentle on the hair and creates beautiful, uniform waves.
Step-by-Step to Soft, Bouncy Curls
- Position the Ribbon: Place the ribbon on top of your head like a headband, securing it with a claw clip right in the middle to keep it from sliding around.
- Section Your Hair: Divide your hair into two equal sections down the back of your head.
- Start Wrapping: Starting from the front near your parting, take a small section of hair and wrap it backward away from your face, looping it over and under the ribbon.
- Add More Hair: Grab a new section of hair from behind, merge it with the first section, and wrap it around the ribbon again. Think of it like a French braid, but you are wrapping instead of braiding.
- Secure the Ends: Work your way down until all the hair on one side is wrapped. Secure the end tightly with a silk scrunchie.
- Repeat and Sleep: Repeat the process on the other side, remove the claw clip, and you are ready for bed!
Tips for Sleeping Comfortably with a Silk Roller
If you are a side sleeper, those long ends hanging down can feel a bit awkward. To sleep like a baby, try crossing the ends of the ribbon behind your head and tying them up on top of your forehead like a crown. Not only does this keep them completely out of your face, but it also prevents the wrap from slipping off your ears while you toss and turn.
Method 2: The Classic Sock Curls (Old-School but Gold)
Don't want to buy a fancy silk ribbon? No problem. Look no further than your sock drawer. A pair of clean, long crew socks (the fuzzier, the better) can give you some of the most voluminous, bouncy curls you've ever seen.
How to Section and Wrap Your Hair
Divide your hair into two to four sections, depending on how thick your hair is and how tight you want the curls. Clip the toe of a sock at your root, letting the rest of the sock hang down. Split that hair section into two strands, and wrap those two pieces in a crisscross, figure-eight pattern around the sock.
Once you reach the bottom, pull the opening of the sock up and over the ends of your hair to lock it all in place. It looks a little goofy, but the fabric of the sock absorbs excess moisture, helping your hair dry faster and lock in the curl.
Method 3: Flexi Rods and Foam Rollers
If you want defined, bouncy ringlets rather than loose, beachy waves, flexi rods are your best bet. These flexible foam sticks can be bent into any shape and come in various diameters.
To use them, wrap small sections of damp hair around the rods, starting from the ends and rolling up to the scalp. Bend the ends of the rod inward to secure them. Because they are soft, they are much easier to sleep in than old-school plastic rollers, though they still require a bit of maneuvering to find a comfortable sleeping position. The payoff? Bouncy, spiral curls that look like they were done with a professional curling wand.
Method 4: Pin Curls for Vintage Glamour
Want to channel your inner 1950s Hollywood starlet? Pin curls are the original heatless styling method, and they work beautifully on all hair lengths—especially shorter bobs.
Take small, damp sections of hair, wrap them around two fingers to create a flat loop against your scalp, and secure them with a bobby pin or a flat double-prong clip. Cover your head with a silk scarf to keep the pins flat and secure while you sleep. When you brush them out in the morning, you’ll have gorgeous, structured, vintage waves that scream elegance.
Method 5: The T-Shirt Halo Method for Effortless Beach Waves
For those who prefer a laid-back, lived-in texture, the T-shirt halo (sometimes called "plopping") is incredible.
Twist a soft cotton T-shirt into a long, tight tube and tie the ends together with an elastic to form a halo ring. Place the ring on top of your head, and wrap sections of your hair up and around it. Because the T-shirt fabric is wider than a silk ribbon, it creates broader, looser bends rather than tight curls, giving you that perfect, effortless beachy vibe.
Troubleshooting Common Heatless Curl Fails
Sometimes, things don't go quite as planned. If you've ever unwrapped your hair only to look like a fluffy cloud or a wet noodle, don't panic. Let’s fix those common hiccups together.
"My Hair is Still Wet in the Morning!"
This is the classic rookie mistake. If your hair is still damp when you take it down, the curls will drop within minutes. If you wake up and feel any coldness or moisture in your strands, grab your blow dryer and blast the wrapped hair with warm air for five minutes, followed by a cool shot, before taking it out. Next time, make sure your hair is much drier before you start wrapping.
"My Waves Fell Out in Five Minutes!"
If your curls disappear the second you step outside, your hair needs more "grip." Try using a styling mousse or a texturizing spray on damp hair before wrapping. Also, avoid using heavy, oil-rich conditioners or deep masks on wash day, as they can weigh fine hair down and make it too slippery to hold a shape.
"Help, I Have Weird Frizz and Kinks!"
Frizz usually happens when hair rubs against your pillowcase, or if the wrap wasn't secure enough. Always use silk or satin scrunchies, and wrap your head in a silk bonnet or sleep on a silk pillowcase to minimize friction. To fix any weird kinks near your roots, damp your fingers slightly and smooth over the kink, or use a tiny drop of hair oil to tame the flyaways.
How to Preserve Your Heatless Curls for Day Two and Beyond
Now that you have gorgeous waves, you want to make them last as long as possible. Before bed, loosely twist your hair into a high "pineapple" bun on top of your head using a silk scrunchie. This keeps you from sleeping directly on your curls and flattening them overnight.
In the morning, shake them out, add a quick spritz of dry shampoo at the roots for volume, and run a drop of lightweight hair oil through the ends to revive the shine. You can easily stretch your heatless curls for three to four days with minimal effort!
Conclusion
Embracing heatless curls isn't just about saving your hair from thermal damage; it’s about reclaiming your morning routine and loving your hair’s natural resilience. Whether you choose the viral silk ribbon, a pair of old socks, or vintage pin curls, the key is patience, practice, and a little bit of prep work. Once you find the method that fits your hair type and sleep style, you'll wonder why you ever spent all those hours burning your fingers on a curling wand. So, prep your strands, wrap them up, and get ready to wake up to the easiest, healthiest hair day of your life.
Frequently Asked Questions (FAQs)
Can I do heatless curls on completely dry hair?
Yes, but they won't last nearly as long. For the best results, your hair needs a tiny bit of moisture to break and reform the hydrogen bonds. If your hair is completely dry, give it a very light misting with water or a leave-in conditioning spray before wrapping it up.
How long do I need to leave heatless rollers in?
For the longest-lasting results, keep them in for at least 6 to 8 hours, which is why overnight sleeping is the most popular option. However, if you're in a rush, you can leave them in for 2 to 3 hours on slightly damp hair and speed up the drying process with a blow dryer on a low, warm setting.
Will heatless curls work on short hair?
Absolutely! While the viral silk ribbon works best on medium to long hair, short-haired beauties can get incredible results using smaller flexi rods, classic pin curls, or even wrapping hair around a thin, elastic headband.
How do I prevent my hair from frizzing while sleeping?
The secret is minimizing friction. Swap your cotton pillowcase for a 100% mulberry silk or satin one. You can also wear a silk sleep bonnet over your wrapped hair to keep everything locked securely in place and prevent tossing and turning from disrupting your curls.
Why do my heatless curls look crimped at the ends?
This usually happens if the very ends of your hair are bent awkwardly when you secure them with the scrunchie. Make sure to wrap your hair smoothly all the way to the very tips, keeping them flat against the roller or sock, and secure the scrunchie gently without bending the hair backward.
Post Comment