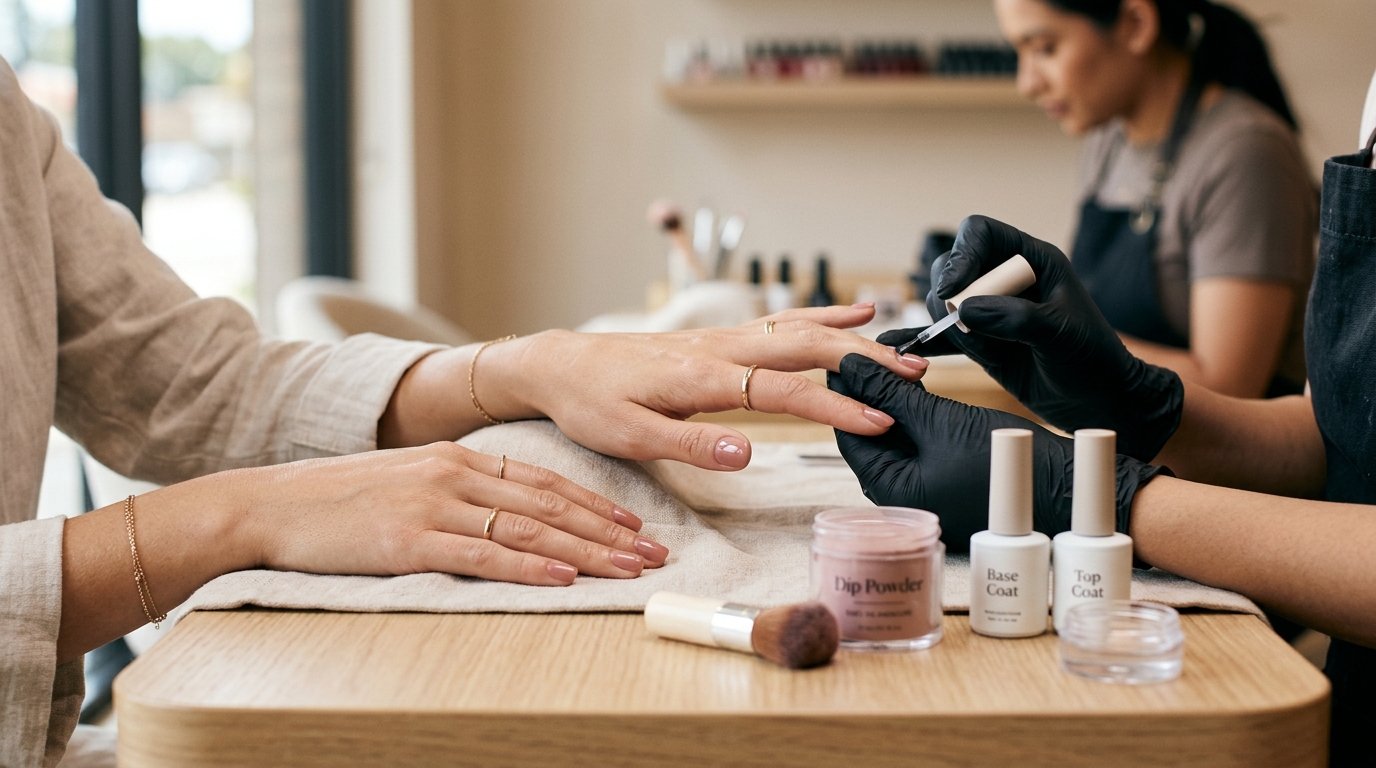
Dip Powder Nails 101: Everything You Need to Know Before Your First Salon Visit
Have you ever stared at your chipped nail polish just two days after a manicure and felt a tiny piece of your soul crush? We’ve all been there. If you are tired of the constant cycle of painting, chipping, and repainting, it is time to talk about the absolute game-changer that has taken the beauty world by storm: dip powder nails. Often hailed as the holy grail of long-lasting manicures, dip powder promises the durability of acrylics with the ease and shine of a gel mani. But if you’ve never tried it before, walking into a salon and asking for a "dip" can feel a little intimidating. What actually goes into the process? Is it safe for your natural nails? How do you make sure your technician is practicing proper hygiene?
Take a deep breath and relax. We have got you covered. Consider this your ultimate, fluff-free, beginner-friendly guide to everything you need to know before your very first dip powder salon visit. By the time you finish reading, you’ll be walking into that salon like an absolute pro, ready to get the gorgeous, bulletproof nails of your dreams.
—
What Exactly Are Dip Powder Nails?
To understand dip powder, it helps to think of it as the cool, modern cousin of traditional acrylics. Often referred to by the popular brand name SNS, dip powder is a unique manicuring system that uses a combination of a liquid adhesive base and a finely milled, pigmented acrylic powder.
Instead of painting on wet polish and waiting for it to dry under a lamp, your nail technician coats your nail in a clear adhesive base and then literally dips your finger into a jar of colorful powder. The powder sticks only to the adhesive, creating an instant, even layer of rich color.
The Science Made Simple: Acrylic vs. Gel vs. Dip
Let’s break down the chemistry without making your eyes glaze over. Think of traditional acrylics as a heavy-duty custom build. They require a liquid monomer and a powder polymer mixed together on a brush, which the nail tech sculpts onto your nail. It’s thick, strong, and has a very distinct, chemical smell.
Gel polish, on the other hand, is like a flexible, baked-on glaze. It goes on like regular polish but must be cured under a UV or LED light to harden.
Dip powder sits comfortably in the sweet spot right between the two. It uses a cyanoacrylate adhesive (which is actually very similar to medical-grade skin glue) and a dry acrylic powder. It doesn’t require UV light to cure, it doesn’t have the strong odor of traditional acrylic monomer, and it provides a layer of protection that is significantly stronger than gel but lighter and more flexible than standard acrylic extensions.
How the Magic Happens: The Basic Process
The magic of dip powder lies in its simplicity and speed. Because the powder is incredibly fine, it bonds almost instantly with the adhesive base. Once a few layers of base and powder are applied, a liquid "activator" is brushed over the top.
This activator triggers a chemical reaction that cures and hardens the powder in seconds—no fancy light machines required. After a quick buff and a shiny top coat, you are fully dry and ready to dig through your purse for your car keys without any fear of smudging.
—
Why Everyone is Obsessed: The Major Benefits
There is a reason dip manicures have dominated social media feeds and salon menus over the last few years. In 2026, we are all about low-maintenance luxury, and dip powder fits that vibe perfectly. Let’s look at why beauty enthusiasts are completely obsessed with this technique.
Durability That Defies Daily Life
If your daily routine involves typing furiously on a keyboard, doing dishes, lifting weights, or chasing kids, regular nail polish doesn’t stand a chance. Even gel manicures can start to lift or peel at the edges after a week or two.
Dip powder is essentially armor for your fingernails. Because the acrylic resin is incredibly tough, a quality dip manicure can easily last three to four weeks without a single chip, crack, or peel. It maintains its freshly-done look through almost anything you throw at it.
No UV Light Required (Say Goodbye to the Bake)
One of the biggest concerns people have with gel manicures is the repeated exposure of their hands to UV radiation from the curing lamps. Over time, this exposure can contribute to premature aging of the skin on your hands and, in rare cases, increase skin health risks.
Dip powder completely eliminates this worry. The liquid activator does all the hardening work chemically. You can sit back, relax, and enjoy your manicure knowing your hands aren't getting an unnecessary dose of UV rays.
An Endless Rainbow of Colors and Finishes
Think dip powder is limited to basic shades? Think again. The color payoff with dip powder is incredibly rich and vibrant because you are working with pure, concentrated pigment.
Whether you want a classic, clean French manicure, a moody matte black, a shimmering holographic glitter, or a trendy chrome finish, there is a dip powder for you. Salons now carry hundreds of shades, making it incredibly easy to find the exact color that matches your mood or the season.
—
Are Dip Nails Safe for Your Natural Nails?
This is the million-dollar question. Many people worry that such a durable manicure must be incredibly damaging to the natural nail underneath. The short answer? Dip powder itself is not inherently damaging. However, how it is applied, and more importantly, how it is removed, makes all the difference in the world.
The Myth of "Damage-Free" Manicures
Let’s bust a major beauty myth: no long-wear manicure system is 100% damage-free. Any product that bonds tightly to your nail plate has the potential to cause thinning if it is scraped, peeled, or filed off aggressively.
When applied correctly by a skilled professional, dip powder actually acts as a protective shield, preventing your natural nails from breaking or peeling while they grow out underneath. The damage only occurs when shortcuts are taken during the prep or removal phases.
The Importance of Proper Removal
If you take only one piece of advice from this article, let it be this: never, ever peel off your dip nails. We know how tempting it is when a corner starts to lift after a month. But peeling off dip powder is like peeling off a layer of your actual nail plate. It will leave your nails thin, weak, papery, and painful.
The only safe way to remove dip powder is by patiently soaking them in pure acetone. This gently dissolves the adhesive bond, allowing the acrylic powder to slide off effortlessly without harming your natural nail.
—
What to Expect During Your First Salon Visit
Walking into a salon for a new service can feel a little like trying to navigate a foreign country without a map. Let’s walk through the entire step-by-step process of a standard dip powder service so you know exactly what your technician is doing at every moment.
Step 1: Prep and Prime
A great manicure always starts with immaculate prep work. Your technician will begin by removing any old polish, sanitizing your hands, and pushing back your cuticles.
Nail Shaping and Cuticle Care
Next, they will file your nails into your desired shape (oval, almond, coffin, or square—the choice is yours!). Once shaped, they will gently buff the surface of your natural nails. This step is crucial because it removes the natural oils and creates a slightly textured surface, which helps the adhesive bond securely to your nail. Finally, they will apply a dehydrating primer to ensure your nails are completely clean and dry.
Step 2: Base Coat and the Dip
Now, the fun begins. Your technician will apply a thin, even layer of the clear adhesive base coat to one nail. Before it has a chance to dry, they will dip your finger into the powder jar at a 45-degree angle, or gently pour the powder over your nail.
After a few seconds, they will tap your finger to shake off any excess powder and use a soft, fluffy brush to sweep away the loose dust. This process is typically repeated two to three times per nail to build up the perfect thickness and color opacity.
Step 3: The Activator and Shaping
Once the dipping layers are complete, your nails will look a bit thick, powdery, and rough around the edges. Don’t panic! This is completely normal.
The technician will brush on a generous coat of the liquid activator. Within a minute, the liquid will penetrate the layers and harden them into a solid, durable shell. Once fully cured, the tech will use a nail file and an electric file (often called an e-file) to shape, smooth, and contour the nail, smoothing out any bumps and thinning down the edges near your cuticles for a seamless, natural look.
Step 4: Top Coat and Shine
After your nails are perfectly shaped and buffed smooth, you will wash your hands with plain water to remove any lingering dust. The technician will then apply a final coat of activator, followed by two thin layers of a specialized shiny top coat.
This top coat air-dries incredibly fast, sealing in the color and giving your new dip nails a gorgeous, glass-like shine. A quick massage with cuticle oil, and you are good to go!
—
Critical Salon Safety and Hygiene Tips
Because dip powder involves dipping fingers into jars, hygiene is of the utmost importance. When you visit a salon, you must keep an eye out for safe practices to protect yourself from nail infections.
The "Double-Dipping" Danger: What to Watch Out For
In a busy salon, having multiple clients dip their fingers directly into the same jar of powder is a major hygiene red flag. If a client before you had a nail fungus or bacterial infection, those germs can live in the dry powder and transfer directly to your nails.
To stay completely safe, look for salons that practice these hygienic alternatives:
- The Pour-Over Method: Instead of dipping your finger into the jar, the technician uses a clean spoon or scoop to pour the powder over your nail, catching the excess in a disposable tray.
- Individual Portioning: The technician scoops a small amount of powder out of the main jar into a small, single-use cup for your service and discards any leftover powder afterward.
- The Brush-On Method: The technician brushes the powder onto your nails using a clean, dedicated tool.
If you see a salon dipping client after client directly into the main jar, do not be afraid to speak up and ask for the pour-over method, or walk out and find a salon that prioritizes your health.
—
How to Make Your Dip Manicure Last for Weeks
Once you have invested your time and money into a gorgeous new set of dip nails, you want to make sure they last as long as possible. Here are a few simple habits to keep your manicure looking fresh for weeks:
- Protect Your Hands: Always wear rubber gloves when washing dishes, cleaning with harsh household chemicals, or working in the garden. Chemicals and hot water can weaken the adhesive bond over time.
- Oil Those Cuticles: Apply cuticle oil to your nail beds daily. This keeps your skin hydrated, prevents hangnails, and keeps the edges of your dip manicure flexible, reducing the chances of lifting.
- Avoid Using Your Nails as Tools: Your nails are jewels, not tools! Don’t use them to pry open soda cans, scrape off labels, or open packages. Use the pads of your fingers or actual tools instead.
- Keep Them Dry Early On: Try to avoid soaking your hands in hot baths or swimming pools for the first 24 hours after your appointment to allow the adhesive to fully settle.
—
How to Safely Remove Dip Powder at Home
If you can’t make it back to the salon for removal, don't sweat it. You can safely remove your dip powder at home with a little patience and the right supplies.
What you will need:
- A coarse nail file (100/180 grit)
- 100% pure acetone (regular nail polish remover won't cut it!)
- Cotton balls
- Aluminum foil cut into small squares
- A cuticle pusher or wooden orangewood stick
- Nail buffer and cuticle oil
The Step-by-Step Home Removal Guide:
- Break the Seal: Use your coarse nail file to gently file down the shiny top layer of your dip nails. You want to remove the shiny top coat completely until the surface looks chalky and rough. This allows the acetone to penetrate the acrylic layers.
- Prep the Soak: Soak a cotton ball in pure acetone and place it directly on top of your nail.
- Wrap It Up: Wrap a square of aluminum foil tightly around your finger to secure the cotton ball in place. Repeat this for all ten fingers. (Pro-tip: Do one hand at a time so you still have a free hand to work with!).
- Wait Patiently: Let your nails soak for 15 to 20 minutes. Resist the urge to peek! The acetone needs time to melt the acrylic.
- Gently Wipe Away: Remove the foil wraps one by one. The dip powder should look soft, gummy, and partially dissolved. Use the cotton ball to gently wipe the dissolved product off your nail. If there is still stubborn residue, use your wooden stick to gently scrape it away—never scrape hard. If it doesn't budge, wrap it back up for another 5 minutes.
- Hydrate, Hydrate, Hydrate: Once all the powder is gone, wash your hands thoroughly. Acetone is extremely drying, so slather your nails and cuticles in rich cuticle oil and hand cream to restore moisture immediately.
—
Conclusion
Dip powder nails are an absolute game-changer for anyone looking for a gorgeous, long-lasting manicure that can keep up with a busy life. By understanding the process, knowing what to look for in terms of salon safety, and committing to proper removal, you can enjoy beautiful, healthy nails without any of the stress.
So, what are you waiting for? Book that salon appointment, pick out your dream color, and get ready to fall in love with your hands all over again. You deserve it!
—
Frequently Asked Questions (FAQs)
1. How long does a dip powder manicure usually take at the salon?
Typically, a full dip powder service takes anywhere from 45 minutes to an hour. If you need your previous dip or gel manicure removed first, add an extra 20 to 30 minutes to your total salon time.
2. Can you do dip powder on short nails?
Absolutely! Dip powder looks fantastic on nails of all lengths. In fact, because it adds a strong protective layer, it is one of the best ways to help short, weak nails grow out long and strong without breaking.
3. Can you get nail extensions with dip powder?
Yes, you can. If you want longer nails, your technician can glue plastic nail tips to your natural nails, file them to your preferred shape, and then apply the dip powder over the top of both the tip and your natural nail to create a seamless, sturdy extension.
4. How often should I take a break from dip powder?
If your nails are healthy and you are getting your dip powder applied and removed correctly by a professional, you don't necessarily need to take regular breaks. However, if you notice your natural nails feeling thin, peeling, or flexible, it’s a good idea to take a 2- to 4-week break and focus on strengthening treatments and cuticle oils.
5. Does dip powder hurt when it's being applied?
Not at all! The application process is completely painless. The only time you might feel a slight sensation is a brief warmth when the activator is applied, or a gentle vibration if the technician uses an electric file to shape your nails. If you ever feel pain or burning, let your nail technician know immediately.
Post Comment