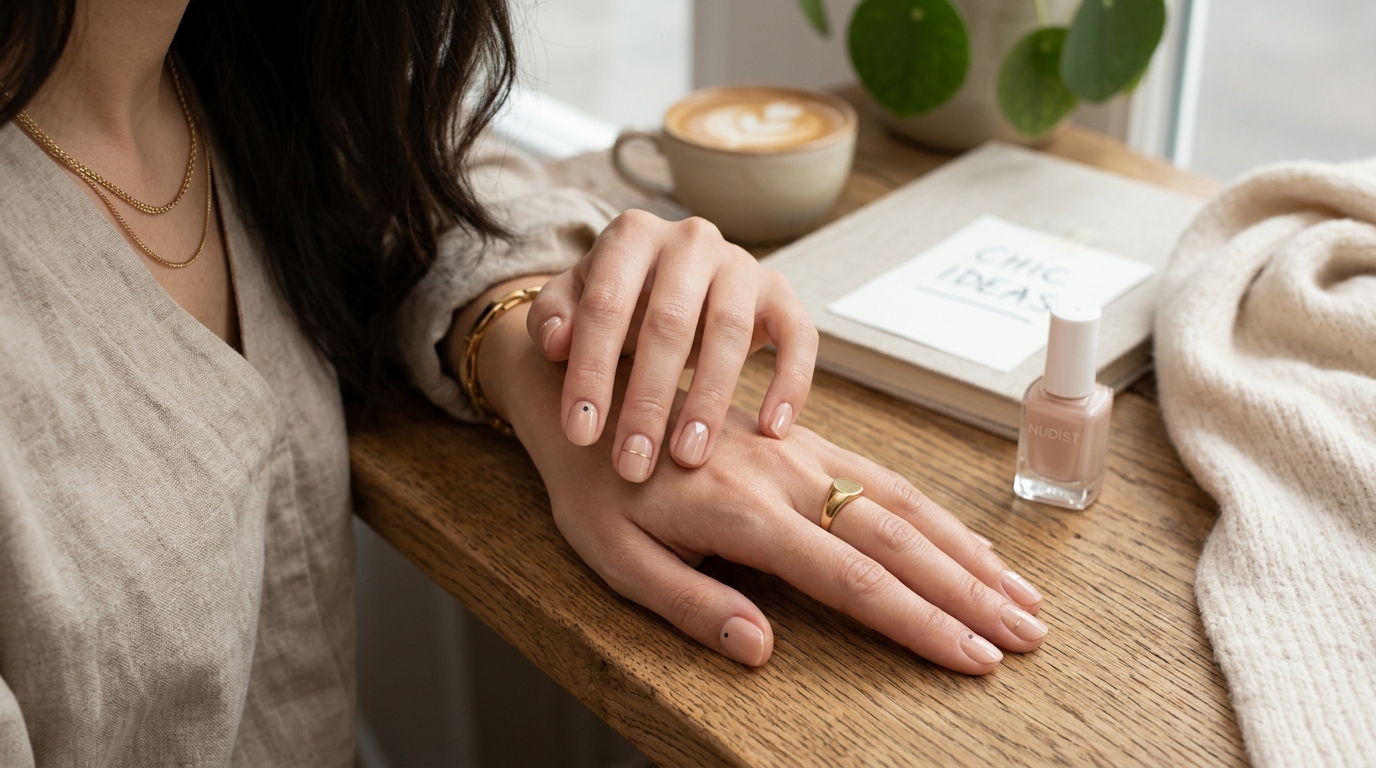
10 Minimalist Nail Art Ideas for an Effortlessly Chic Look
Have you ever looked at your hands and felt like your nails were wearing you, instead of the other way around? We’ve all been there. For years, the nail world was dominated by ultra-long acrylics, blinding neon colors, and 3D charms that made typing a simple text message feel like a high-stakes coordination test. But as we navigate 2026, a massive shift has taken place. The beauty world has collectively taken a deep breath, stripped away the excess, and embraced the gorgeous world of minimalist nail art.
Minimalism isn’t about being boring or hiding your personal style. In fact, it is quite the opposite. It is about making a statement with a whisper rather than a shout. Think of minimalist nail art as the fine jewelry of the beauty world—subtle, elegant, and effortlessly chic. Whether you are running a business meeting, grabbing a iced matcha latte, or heading out for a candlelit dinner, these designs adapt to your life like a second skin. Let’s dive into why this trend is taking over and explore ten stunning, simple designs you can recreate at home or request at your next salon visit.
—
Why Minimalist Nail Art is Dominating 2026
There is a reason your social media feeds are flooded with clean, understated manicures. The "clean girl" aesthetic of previous years has matured into something far more refined, sustainable, and artistic. We are seeing a return to classic styling with a modern, playful twist.
The "Quiet Luxury" Transition
You’ve probably heard the term "quiet luxury" thrown around in fashion, but it has completely revolutionized the nail industry too. In 2026, luxury isn't about flashing wealth or wearing the loudest designs. It’s about immaculate grooming, healthy natural nails, and subtle design details that make people look twice. A minimalist manicure tells the world that you pay attention to the details without trying too hard. It is the ultimate flex of effortless sophistication.
Time-Saving Beauty for Busy Lives
Let’s be real: who has three hours to sit in a salon chair every two weeks for intricate hand-painted murals or heavy gel extensions? Our schedules are busier than ever. Minimalist nail art is incredibly forgiving. Because many of these designs utilize negative space or sheer bases, your natural nail growth is barely noticeable. This means you can stretch the lifespan of your manicure for weeks without that awkward, high-maintenance gap at your cuticle line. It’s practical, gorgeous, and incredibly smart.
—
How to Prepare Your Canvas: The Perfect Prep
Before we even think about polish, we need to talk about prep. You wouldn't paint a masterpiece on a cracked, dusty canvas, would you? The secret to making a minimalist manicure look expensive is the health and shape of the underlying nail. Because the art itself is subtle, any rough cuticles or jagged edges will stand out.
Nail Health First
Start by giving your hands some love. Hydration is your absolute best friend here. If you aren't using a high-quality cuticle oil daily, consider this your sign to start. Apply a drop of jojoba-rich oil to the base of each nail every night before bed. Not only does this keep your cuticles soft and prevent hangnails, but it also stimulates healthy nail growth. When shaping, opt for natural silhouettes like a soft square (squoval) or a gentle almond. These shapes elongate your fingers and provide the perfect backdrop for minimalist designs.
The Essential Toolkit
You don’t need a massive suitcase of nail supplies to achieve these looks. In fact, a few key tools will turn you into a DIY pro overnight:
- A glass nail file: Unlike harsh emery boards, glass files seal the keratin layers of your nail edge, preventing peeling and splitting.
- An ultra-fine detail brush: This is the Holy Grail for clean lines and micro-details. Look for one with synthetic bristles that are long and thin.
- A double-ended dotting tool: Perfect for creating flawless, symmetrical dots of various sizes.
- A high-quality ridge-filling base coat: This smooths out the surface of your nail, ensuring your sheer polishes apply beautifully without streaking.
—
10 Minimalist Nail Art Ideas for an Effortlessly Chic Look
Now that your hands are prepped and your tools are ready, let's get to the fun part. Here are ten incredibly chic, minimalist nail art designs that prove less really is so much more.
1. The Micro French Mani
Forget the thick, chalky white French tips of the early 2000s. The micro French manicure is all about a line so thin it almost looks like a trick of the light. It’s incredibly delicate, modern, and instantly elongates your nails.
- The Vibe: Ultra-polished, clean, and classic.
- How to Get the Look: Start with a sheer, skin-tone-matching pink or nude base. Dip your fine detail brush into a crisp white, rich black, or even a soft pastel polish. Drag the brush slowly across the very tip of your nail, keeping the line as skinny as possible.
Pro Tip for Clean Lines
If your hand is a bit shaky, try holding the brush completely still and rotating your finger instead. This simple trick uses your body's natural pivot point to create a perfectly curved, smooth line every single time.
2. Single Dot Sophistication
If you can hold a pen, you can master this look. The single dot manicure is the epitome of modern art on a tiny scale. It is incredibly simple, yet it looks like it belongs in a high-end contemporary art gallery.
- The Vibe: Artsy, intentional, and clean.
- How to Get the Look: Apply two coats of a sheer milky base. Take your dotting tool, dip it into your favorite accent color (black, gold, or even a vibrant cobalt blue), and place a single dot right at the center of your nail bed, just above the cuticle. Seal it with a glossy top coat.
3. Abstract Negative Space
Negative space nail art uses your natural nail color as part of the design. By leaving sections of the nail bare, you create a beautiful, breathable look that grows out beautifully without showing a harsh line.
- The Vibe: Edgy, architectural, and low-maintenance.
- How to Get the Look: Use striping tape or a steady hand to paint a simple geometric shape—like a diagonal block or a tiny triangle—on only half of your nail. Keep the other half completely bare, protected only by a glossy base and top coat.
4. Barely-There Chrome
The chrome obsession has evolved. Instead of the heavy, metallic mirror finishes of the past, 2026 is all about a soft, pearlescent glaze that catches the light when you move your hands. It looks like your nails are glowing from within.
- The Vibe: Ethereal, dreamy, and clean-girl approved.
- How to Get the Look: Paint your nails with a sheer, milky white or pale lavender polish. Once dry (or cured, if using gel), gently buff a tiny amount of pearl chrome powder over the surface. Wipe away the excess and lock it in with a glassy top coat.
5. The Skinny Side Stripe
Who says lines have to go across the nail? A vertical stripe running down the side of your nail is an incredible optical illusion that makes your fingers look longer and more slender.
- The Vibe: Sporty, sleek, and minimalist.
- How to Get the Look: Choose a contrasting color like a deep forest green or a metallic silver. Using your detail brush, draw a single, continuous vertical line from the cuticle to the tip, offsetting it slightly to the left or right side of the nail.
6. Milky Ombré
If you love a soft, romantic look, the milky ombré (sometimes called "bath water nails") is for you. It features a seamless, hazy transition from a creamy white at the tips to a sheer, warm pink at the cuticle.
- The Vibe: Soft, romantic, and cloud-like.
- How to Get the Look: Apply a sheer pink base. Dab a small amount of milky white polish onto a makeup sponge and gently tap it onto the top half of your nail, diffusing it downward. Apply a plump top coat to blend the transition perfectly.
7. Tiny Metallic Accents
Think of this design as jewelry for your nails. A tiny fleck of gold foil or a minute metallic star adds just enough sparkle to catch the eye without looking overly festive or gaudy.
- The Vibe: Festive yet restrained, elegant, and whimsical.
- How to Get the Look: Apply your favorite sheer nude polish. While the second coat is still slightly tacky, use tweezers to place a tiny piece of gold leaf or a miniature metallic nail sticker near the base of one or two accent nails. Press it down gently and apply two coats of top coat to seal the edges.
8. Matte & Glossy Contrast
Texture play is an incredibly clever way to create nail art without introducing any extra colors. By combining matte and glossy finishes, you create a subtle, tactile design that is incredibly pleasing to look at.
- The Vibe: High-fashion, tactile, and unexpected.
- How to Get the Look: Paint your nails with a rich, dark color like espresso brown or charcoal grey. Apply a matte top coat over the entire nail. Once dry, use a glossy top coat to paint a classic French tip or a few abstract swirls. The contrast between the velvety matte and the shiny gloss is stunning.
9. The Half-Moon Slit
This design pays homage to vintage retro manicures but strips it down for the modern era. Instead of painting a full half-moon at the base of your nail, you leave a tiny, curved sliver of negative space.
- The Vibe: Retro-modern, classy, and architectural.
- How to Get the Look: Place a round reinforcement sticker over the lunula (the crescent moon shape at the base of your nail). Paint the rest of your nail with a rich, moody shade like navy blue or burgundy. Peel the sticker away while the polish is still wet to reveal a clean, bare crescent.
10. Earthy Terrazzo Specks
Inspired by natural stone and mid-century modern design, this look features tiny, irregular flecks of earthy tones scattered across a neutral background. It is organic, grounded, and incredibly unique.
- The Vibe: Organic, artistic, and warm.
- How to Get the Look: Use a soft cream or sand-colored polish as your base. Using a toothpick or a fine brush, add tiny, irregular dots of terracotta, sage green, and charcoal. Don't worry about making them perfect—the beauty of terrazzo lies in its natural imperfection.
—
Choosing the Right Polish Shades for Minimalism
The secret to pulling off minimalist nail art is selecting the right color palette. Because the designs are simple, the colors you choose do a lot of the heavy lifting.
| Polish Category | Best Shades for Minimalist Art | Skin Tone Pairing | | :— | :— | :— | | Sheer Nudes | Soft blush, sandy beige, sheer apricot | Match your skin's undertone (cool, warm, neutral) | | Creamy Milks | Coconut milk, oat milk, soft lavender-gray | Universally flattering, perfect for negative space | | Rich Accents | Espresso, forest green, charcoal, burgundy | Great for micro-lines, dots, and tips | | Pop Colors | Cobalt blue, mustard yellow, neon coral | Use sparingly (e.g., a single dot or micro-stripe) |
The Power of Nudes and Sheers
Finding your perfect nude is like finding the perfect pair of jeans—it changes everything. If you have cool undertones, look for sheer pinks and soft mauves. If you have warm undertones, opt for peaches, creams, and golden beiges. A sheer polish allows your natural nail bed to peek through, creating a healthy, flushed look that serves as the perfect canvas for minimalist art.
Using Pops of Color Strategically
Minimalism doesn't mean you are locked into a lifetime of beige and white. You can absolutely use vibrant colors! The trick is scale. A neon orange nail might feel overwhelming, but a neon orange micro-French tip or a single neon orange dot on a sheer nude nail is incredibly chic, playful, and balanced. It shows you aren't afraid of color, but you know how to exercise restraint.
—
How to Make Your Minimalist Mani Last
There is nothing worse than spending time on your nails only to have them chip the very next day. Because minimalist designs rely on clean, perfect lines, a chip can ruin the entire aesthetic. Here is how to lock your design in for the long haul:
- Dehydrate the nail bed: Before applying your base coat, swipe your nails with a cotton pad soaked in pure acetone or rubbing alcohol. This removes any natural oils that could prevent the polish from adhering.
- Cap the free edge: When applying your base coat, polish, and top coat, always run the brush along the very edge of your nail tip. This "caps" the nail, creating a protective barrier that prevents water from getting under the polish and causing lifting.
- Reapply top coat: Every three to four days, apply a thin layer of quick-dry top coat. This restores the glassy shine and adds a fresh layer of protection against daily wear and tear.
- Wear gloves: When doing dishes, cleaning with chemicals, or gardening, protect your hands with gloves. Water is the number one enemy of nail polish—it causes your natural nails to expand and contract, which cracks the rigid polish on top.
—
Conclusion
At the end of the day, beauty should be a source of joy, expression, and relaxation—not a stressful chore. Minimalist nail art offers the perfect balance of style and simplicity. It proves that you don't need to shout to be noticed, and that true elegance lies in the quiet, thoughtful details. Whether you opt for a tiny metallic star, a micro-French tip, or a single sophisticated dot, these designs are bound to make you feel polished, put-together, and effortlessly chic. So, grab your file, pick your favorite sheer shade, and let your hands do the talking!
—
Frequently Asked Questions (FAQs)
Can I achieve these minimalist designs on short nails?
Absolutely! In fact, minimalist nail art often looks best on short, neatly manicured nails. Designs like the micro French, single dot, and vertical side stripe are incredibly flattering on shorter nails because they create the illusion of length without requiring long extensions.
What is the best top coat for a glossy, gel-like finish at home?
To get that plump, high-shine look without a UV lamp, look for "gel-effect" air-dry top coats. Brands like Seche Vite, Essie Gel Couture, and Sally Hansen Miracle Gel offer incredible, thick top coats that dry quickly and mimic the glossy finish of a professional salon gel manicure.
How do I stop sheer nude polishes from looking streaky?
Sheer polishes can be notoriously difficult to apply smoothly. To prevent streaking, always start with a ridge-filling base coat to create a smooth surface. When applying the sheer polish, keep your brush parallel to your nail and use light pressure—floating the polish over the nail rather than dragging it.
Can I do these designs with regular polish, or do I need gel?
You can easily do all of these designs with regular nail polish! The only difference is drying time. When doing detail work with regular polish, make sure to let your base color dry completely before adding your art, and let the art dry for a few minutes before applying your top coat to prevent smearing.
How do I clean up mistakes around my cuticles?
Don't worry if you get polish on your skin! Simply dip a flat, angled makeup brush or a clean cleanup brush into pure acetone. Gently trace the brush around your cuticle and side walls to wipe away any stray polish for a flawless, salon-quality finish.
Post Comment