How to Fix an Over-Moisturized Tattoo and Stop Ink Bubbling
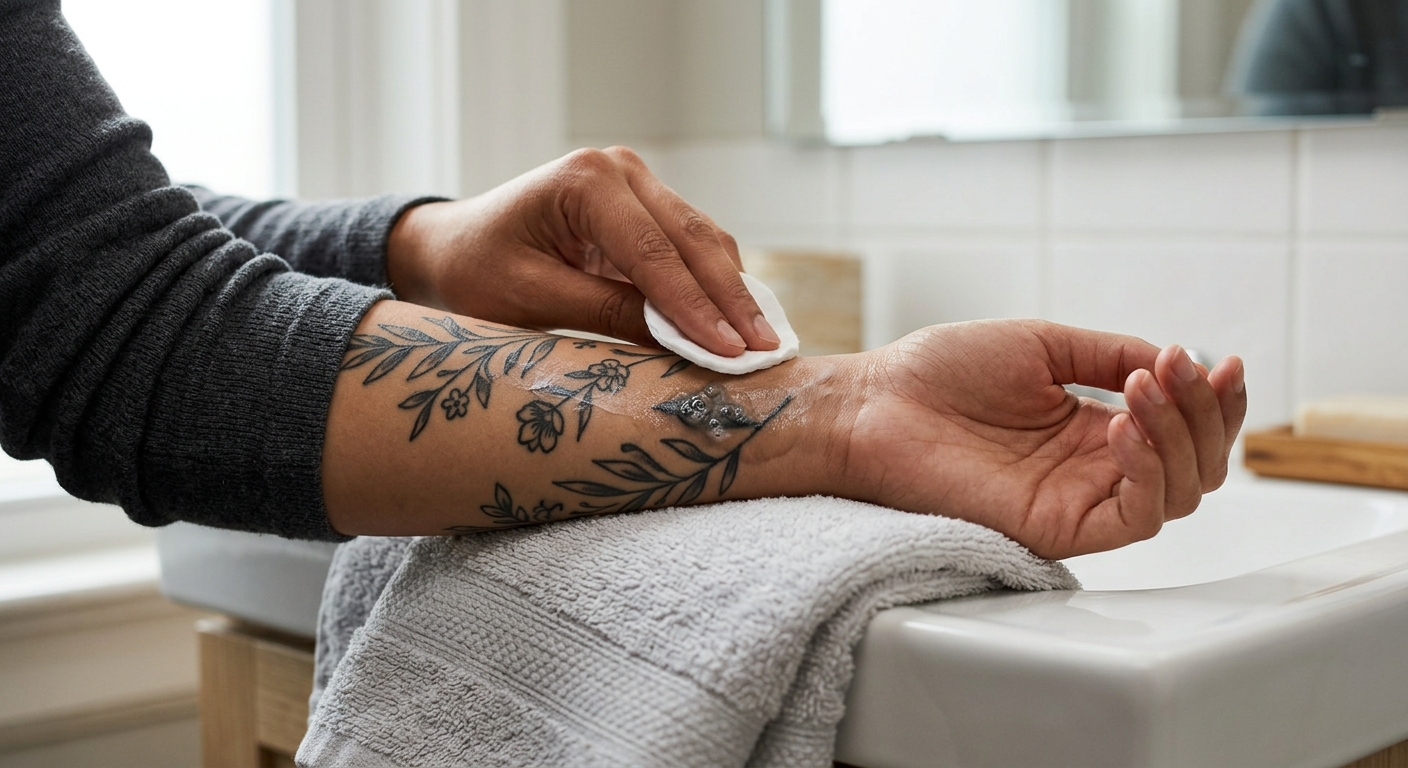
If your healing tattoo feels gummy, looks glossy under light, or has developed soggy scabs that look like trapped bubbles, stop applying lotion immediately. Wash the tattoo gently with lukewarm water and a fragrance-free liquid soap to remove accumulated product, pat it thoroughly dry with a single-use paper towel, and pause all moisturizer for 24 to 48 hours.
Trapping excess product creates a wet environment on top of micro-injuries. Skin cells need oxygen and a stable, drying environment to close the surface wound. When suffocated by thick ointments or frequent lotion applications, the top layer of skin softens and swells—a process called maceration—which loosens scabs and risks pulling pigment out of the dermis before it settles.
What causes tattoo scabs to swell and bubble
When tattooing needles deposit ink into the dermis, your body responds by releasing plasma to seal the micro-wounds. As this fluid dries, it forms a protective scab over the fresh design.
Applying ointment too thickly or too often disrupts this normal healing sequence in three distinct ways:
- Macerated, swollen tissue: Wet scabs absorb trapped moisture like a sponge. Instead of hardening into a thin crust, they turn pale, soft, and gelatinous.
- Fluid pocket formation: Natural wound fluid and excess lotion trap beneath heavy petroleum barriers, pushing upward and making ink look like it is blistering or bubbling under the skin.
- Early pigment rejection: Softened scabs lose their grip on the dermis. They snag easily on clothing or slide off during washing, taking embedded ink with them and leaving patchy spots behind.
Maintaining a healing tattoo requires balancing enough flexible moisture to prevent skin cracking against keeping the surface dry enough for scabs to firm up naturally.
A 3-step protocol to reset an over-moisturized tattoo
If your skin feels sticky or looks wet despite not having washed it recently, use this straightforward reset method to let the surface dry without picking at scabs.
1. Wash away accumulated product residue
Wash your hands thoroughly with clean water and plain soap before touching the area. Wet your tattoo with lukewarm water and apply a small amount of fragrance-free, dye-free liquid soap using only your fingertips.
Gently work the soap over the tattoo in broad, light circles to dissolve slick ointment layer by layer. Do not use washcloths, loofahs, or fingernails, as friction will tear soft scabs. Rinse until the skin feels clean rather than slippery.
2. Pause moisturizer for 24 to 48 hours
Gently press a clean paper towel against the tattoo to blot away water. Avoid cloth bath towels, which harbor residual bacteria and release loose cotton fibers that stick to weeping skin.
Leave the tattoo completely exposed to clean air. Do not apply lotion, petroleum jelly, specialty tattoo butter, or plastic wraps during this window. Allow 24 to 48 hours for trapped moisture to evaporate. As the surface dries out, soggy scabs will shrink and turn into firm, flat crusts.
3. Reintroduce lotion sparingly
Resume moisturizing only after the tattoo feels distinctly tight and dry, and scabs have hardened.
Switch from heavy, petroleum-based ointments to a light, water-based, fragrance-free lotion. Use a minimal amount—roughly a single grain of rice for an area the size of your palm. Massage it completely into the skin until the surface returns to a natural matte finish.
Distinguishing over-moisturization from a skin infection
Because excess wetness traps heat and creates an environment where bacteria thrive, over-moisturized skin can easily be confused with a developing infection. Check your symptoms against these key differences before continuing home care.
Common signs of over-moisturization
- Texture: Surface feels sticky, gummy, or slippery. Scabs look pale, milky, or raised around the edges.
- Redness: Mild pinkness limited strictly to the immediate border of the ink, fading slightly each day.
- Pain: Light surface tenderness or stiff tightness when flexing the surrounding muscle.
- Discharge: Clear or slightly ink-tinted plasma when blotted dry. No foul odor.
- Temperature: Skin feels normal or slightly warm, matching the rest of your body.
Warning signs of a bacterial infection
- Texture: Severe blistering, deep open sores, or wide cracks oozing fluid continuously.
- Redness: Dark red, purple, or expanding inflammation spreading far past the tattoo border, sometimes accompanied by red streaks tracking outward.
- Pain: Deep, throbbing, or escalating pain that grows worse four to seven days after your appointment.
- Discharge: Thick yellow, green, or cloudy pus leaking from cracked skin, often with a noticeable odor.
- Systemic symptoms: The tattooed area feels hot to the touch, accompanied by body chills, fever, or overall fatigue.
If you observe symptoms of a bacterial infection, do not rely on dry healing or topical lotions. Contact a physician or visit an urgent care clinic immediately for medical evaluation and proper treatment.
Correct application rules for daily tattoo care
Once your tattoo returns to a healthy drying state, adjust your routine to ensure you never trap excess moisture again.
- Use less product than feels intuitive: A tiny dab is usually enough for a mid-sized piece. If your tattoo shines under room light or feels greasy five minutes after applying lotion, you used too much. Blot the excess gently with a paper towel.
- Rub lotion entirely into the skin: Never leave a visible film sitting on top of your tattoo. Work lightweight lotion gently into the tissue until it disappears entirely.
- Limit moisturizing to twice daily: Applying lotion two times a day—typically once in the morning after cleaning and once at night—is sufficient for most skin types. Resist the urge to reapply lotion every time your skin feels slightly tight. Minor tightness is an expected, healthy part of skin peeling.
- Match product weight to healing phase: Use heavy barrier ointments only during the initial 1 to 3 days if your artist explicitly recommended them. Transition to simple, fragrance-free body lotions for the remainder of the peeling phase (days 4 through 14).
Managing torn scabs, silver skin, and touch-ups
If a soggy scab tore off prematurely during washing or snagged on clothing, handle the underlying tissue carefully to minimize permanent ink loss.
- Leave remaining scab edges untouched: Never pull loose scab fragments. Even if an edge hangs freely, let it detach naturally so you do not drag pigment out of deeper skin layers.
- Keep raw spots clean and dry: If an open spot remains where a scab pulled away early, keep it clean with mild soap and let it dry heal. Drowning an open spot in extra ointment will delay wound closure and worsen pigment loss.
- Understand the silver skin phase: Once scabs fall off, the new skin underneath often looks shiny, dull, or slightly milky. This translucent layer of fresh tissue is called silver skin. Ink frequently appears muted or faded during this stage, but clarity returns over two to four weeks as the upper skin layers mature.
- Schedule touch-ups after full internal recovery: If your tattoo developed light spots or lost lines from premature scab detachment, wait four to six weeks for the dermis to heal completely before visiting your tattoo artist for a touch-up.
Immediate assessment guide
Evaluate your tattoo's current condition to determine your next action:
- If skin is soft, wet, or sticky: Wash gently with fragrance-free liquid soap, blot dry with a single-use paper towel, and leave exposed to clean air without lotion for 24 hours.
- If scabs are firm and skin feels tight: Apply a rice-grain dot of light, fragrance-free lotion, massaging until no sheen remains.
- If you see expanding redness, extreme heat, or pus: Seek medical evaluation from a healthcare professional immediately.
Post Comment