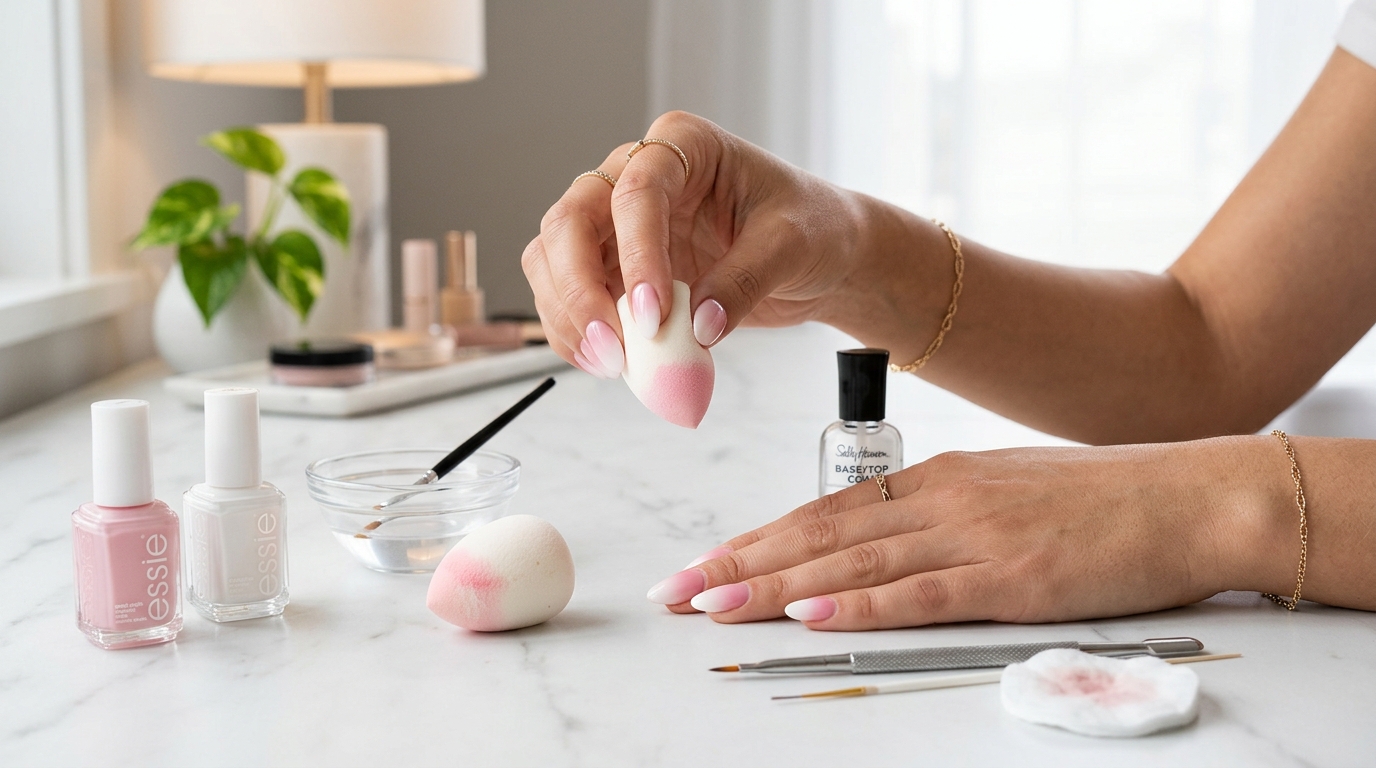
How to Do Ombré Nails at Home: A Step-by-Step Guide for Beginners
Ever looked at a salon-fresh ombré manicure and thought, "There's no way I can pull that off at home without turning my hands into a total crime scene"? Trust me, I’ve been there. You see those mesmerizing, seamless gradients on Instagram and Pinterest—where one gorgeous shade melts effortlessly into another—and it feels like high-level sorcery reserved strictly for professional nail techs. But here’s the best-kept secret in the nail world: creating jaw-dropping ombré nails at home is surprisingly simple once you master a few fundamental techniques. Whether you want a soft, timeless French fade or a vibrant sunset gradient, this guide will walk you through every step so you can achieve salon-quality results right at your kitchen table.
—
What Are Ombré Nails and Why Are They So Popular?
Before we dive into the polishes and sponges, let’s talk about what makes ombré nails an absolute mainstay in the beauty universe. The word "ombré" comes from the French term meaning "shaded" or "shadowed." In the nail world, it refers to a color technique where a base shade gradually blends into another color, creating a smooth, soft gradient across the nail bed.
Why do we love them so much? Beyond looking ridiculously chic, ombré nails are incredibly versatile. They visually elongate your fingers, work on every nail length and shape (from short squoval to long almond), and offer an effortless way to wear multiple trending shades at once.
The Magic of the Seamless Fade
The real beauty of a gradient nail lies in the illusion of depth. Unlike color-blocking, where crisp lines separate contrasting hues, a proper ombré creates a middle ground where the two shades whisper into each other. It’s like watching a sunset on your fingertips. That seamless fade softens bold colors, making bright neons feel wearable and muted pastels look ultra-sophisticated.
French Ombré vs. Color Pop Ombré
If you’re looking for low-maintenance elegance, the classic French Ombré (often called "Baby Boomer nails") is your best friend. It replaces the stark white tip of a traditional French tip with a soft white gradient that melts into a nude or sheer pink base. On the flip side, Color Pop Ombré lets your creativity run wild. Think ocean-inspired teal-to-navy fades, moody plum-to-black transitions, or sunny orange-to-yellow blends. Both styles rely on the exact same technique—it’s just a matter of picking your favorite color story!
—
Gathering Your At-Home Nail Kit
You don’t need an expensive airbrush machine or a professional nail desk to create stunning gradients. Most of the magic happens with a humble cosmetic sponge you can grab at any drugstore. However, having the right supplies lined up before you open a single polish bottle will make the process stress-free and fun.
“ +------------------------------------+---------------------------------------+ | Item | Purpose | +------------------------------------+---------------------------------------+ | Makeup Sponge (Latex or Non-Latex) | Creates the blended gradient effect | | Base Polish & Accent Polish | The two (or three) shades to fade | | Peel-off Cuticle Guard / Latex | Keeps paint off your skin | | High-Shine Top Coat | Blends polish and locks in shine | | Angled Cleanup Brush & Acetone | Cleans up stray polish around edges | +------------------------------------+---------------------------------------+ “
Essential Tools You’ll Need
Here is your ultimate DIY gradient checklist:
- Base Coat: To protect your natural nails and boost polish longevity.
- Two or Three Nail Polishes: High-pigment formulas work best.
- Wedge Makeup Sponges: Dense latex or non-latex cosmetic wedges are perfect.
- Liquid Latex or Peel-Off Cuticle Guard: Your skin's best shield against messy overspray.
- Top Coat: A plump, quick-dry top coat or gel top coat is essential—this is the magic wand that blends the gradient together!
- Clean-up Brush and 100% Pure Acetone: For erasing any stubborn mistakes around your cuticles.
Choosing the Right Polish Formulas
Not all polishes are created equal when it comes to blending. For the cleanest fade, opt for creme polishes with high opacity. Sheer, jelly, or super-runny polishes can take dozens of layers to build up color, which ends up creating a thick, clunky mess on your nail.
Why Gel vs. Regular Polish Matters
Can you do ombré with both regular lacquer and gel polish? Absolutely! But the application methods differ slightly:
- Regular Nail Polish: Quick, inexpensive, and easy to practice with. However, you have to work somewhat briskly before the polish dries on the sponge.
- Gel Polish: Gives you infinite working time because it won't dry until you cure it under a UV/LED lamp. Plus, it lasts 2–3 weeks without chipping!
—
Nail Prep: The Secret to Long-Lasting Ombré
Skipping nail prep is like trying to paint a dusty wall—it just won't stick. If you want your DIY manicure to resist chipping and stay flawless for days, take five minutes to get your canvas ready.
Cleaning and Shaping Your Canvas
Start by removing any old polish thoroughly. File your nails into your desired shape and gently buff the surface with a fine-grit buffer to smooth out ridges. Next, wipe down each nail plate with a lint-free wipe soaked in rubbing alcohol or acetone. This removes natural oils and dust, allowing your base coat to grip the nail securely.
Cuticle Care and Cuticle Guard
Gently push back your cuticles using a wooden stick or cuticle pusher. Avoid applying cuticle oils before painting, as oil prevents polish from adhering.
Once your nails are prepped, apply a generous layer of liquid latex or liquid tape around the skin surrounding your nails. Paint it along your sidewalls and cuticle line. Trust me, when you start dabbing polish everywhere with a sponge, this protective barrier will save you 15 minutes of frustrating cleanup!
—
How to Do Ombré Nails with a Makeup Sponge: Step-by-Step
Ready for the fun part? Grab your supplies, find a comfortable, well-lit workspace, and let’s turn those nails into works of art.
Step 1: Apply Your Base Coat and Base Color
Start with a single layer of your favorite protective base coat. Once dry, apply 1 to 2 thin coats of your lightest chosen color across the entire nail. Why the lightest color? It acts as a bright foundation layer, ensuring your gradient colors pop without requiring ten passes of the sponge. Let this base color dry completely (or cure it if you're using gel) before moving on.
Step 2: Prep the Sponge with Polish
Take your makeup wedge sponge. Pro-tip: Lightly dampen the sponge with water and squeeze out every last drop. A slightly damp sponge prevents it from eating up all your liquid nail polish!
Now, paint generous horizontal stripes of your chosen colors directly onto the flat edge of the sponge.
- Paint the top stripe with your darkest shade.
- Paint the bottom stripe with your lighter shade.
- Overlap the lines slightly in the middle where the shades meet to kickstart the blending process.
Step 3: Dabbing and Blending the Gradient
Line up the sponge over your nail so the lighter shade aligns with your cuticle and the darker shade aligns with your tip (or vice versa, depending on your vibe).
Gently press the sponge onto your nail in a light, bouncing motion. Move the sponge up and down slightly (just a millimeter or two) as you bounce. This slight movement bridges the gap between the two colors and creates that seamless transition instead of two blocky stripes.
Step 4: Layering for Maximum Vibrancy
Don't panic if your first coat looks light, textured, or a bit sheer—that is completely normal! Ombré is all about building opacity in thin layers.
Let the first dabbed layer dry for about a minute. Reapply fresh polish onto your makeup sponge, and bounce it over your nail a second time. Usually, 2 to 3 thin layers are all it takes to reach full color vibrancy and a flawless fade.
Step 5: Seal the Deal with a High-Shine Top Coat
This is where the magic happens! Right after your final layer of sponge-dabbing, while the polish is still slightly tacky, apply a generous layer of clear quick-dry top coat.
Watch closely as you swipe the top coat on: it magically melts the sponge texture away, smooths out any minor bumps, and blends the gradient into a silky-smooth, professional finish. Peel off your liquid latex barrier, clean up any tiny rogue spots with your acetone brush, and voila!
—
Alternative Ombré Techniques to Try
While the cosmetic sponge method is the king of DIY ombré, it isn't the only way to get a dreamy gradient finish. Depending on what you have in your stash, give these fun alternative techniques a shot!
The Fan Brush Method
If you want a soft, painterly, airbrushed look, try using a flat fan nail brush.
- Paint two stripes of polish directly onto your nail side-by-side.
- Take a clean fan brush and lightly drag the bristles back and forth across the border where the two colors meet.
- It creates a delicate, swept effect that looks striking with shimmer and metallic polishes.
The Dip Powder Shortcut
Dip powders are insanely popular right now, and they make gradient nails almost foolproof.
- Apply your dip base coat over the nail.
- Grab a fluffy eyeshadow brush, dip it into your accent powder shade, and gently tap the brush above your nail so the powder dusts lightly over the tip.
- Dip the entire nail into your base powder color to complete the look. It’s fast, clean, and gives an ultra-smooth finish!
—
Pro Tips to Avoid Mess and Common Mistakes
Even experienced nail enthusiasts bump into a few snags now and then. Here is how to troubleshoot the most common ombré hiccups before they ruin your mani-day.
Dealing with Sponge Bubbles
Did your nail end up looking like textured sea foam after spritzing it with the sponge? Small air bubbles happen when a dry sponge pulls up wet polish.
- The Fix: Dampen your sponge with water first and squeeze out the excess. Also, after painting polish onto your sponge, tap it once or twice on a piece of paper towel before touching your nail to remove excess air pockets.
Cleaning Up Like a Pro
If you didn't use liquid latex, don't worry! You don't have to live with messy fingertips.
- Dip an angled makeup or nail art brush into pure acetone.
- Trace along your cuticles and side walls with slow, precise sweeps. An angled brush gives you clean, sharp lines that cotton swabs simply can't deliver.
—
Conclusion
Mastering DIY ombré nails is like unlocking a cheat code for gorgeous, custom manicures at home. It turns basic polish bottles into endless creative possibilities! Remember, your first attempt doesn't need to be flawless—embracing the learning curve is half the fun. Grab a makeup sponge, pick two of your favorite complementary colors, and give this step-by-step technique a spin tonight. Once you smooth on that glossy top coat and see the seamless gradient come alive, you’ll never look at home manicures the same way again. Happy painting!
—
Frequently Asked Questions (FAQs)
1. Can I do ombré nails with gel polish and a sponge?
Yes, absolutely! The process is almost identical, but with gel polish, you don't have to worry about the polish drying on the sponge while you work. Dab the gel onto your nail using the sponge, cure under your LED/UV lamp for 60 seconds, repeat for a second layer, and seal with a gel top coat.
2. Why is my makeup sponge soaking up all my polish?
Dry sponges act like thirsty paper towels and absorb liquid rapidly. To fix this, lightly moisten your sponge with water and squeeze out all excess liquid until it’s just barely damp. This prevents the sponge from absorbing too much polish while allowing the pigment to stay on the surface.
3. How do I stop the ombré effect from looking streaky or blocky?
Streakiness usually happens when you press too hard or keep the sponge frozen in one spot. Use a soft, bouncing motion and shift the sponge slightly up and down while dabbing. This spreads the overlapping middle shade across a wider area, eliminating hard lines.
4. What are the best color combinations for beginner ombré nails?
Nude and white (classic French ombré) or shades within the same color family (like pale pink and deep berry, or sky blue and royal blue) are the easiest to start with. Colors that sit close to each other on the color wheel naturally blend together much smoother than high-contrast complementary colors.
5. How do I get rid of the bumpy texture left behind by the sponge?
The stippled texture left behind by a makeup sponge is completely normal! A thick, high-shine quick-dry top coat (or gel top coat) will instantly fill in those micro-ridges, melting the texture away and leaving a glassy, smooth surface.
Post Comment