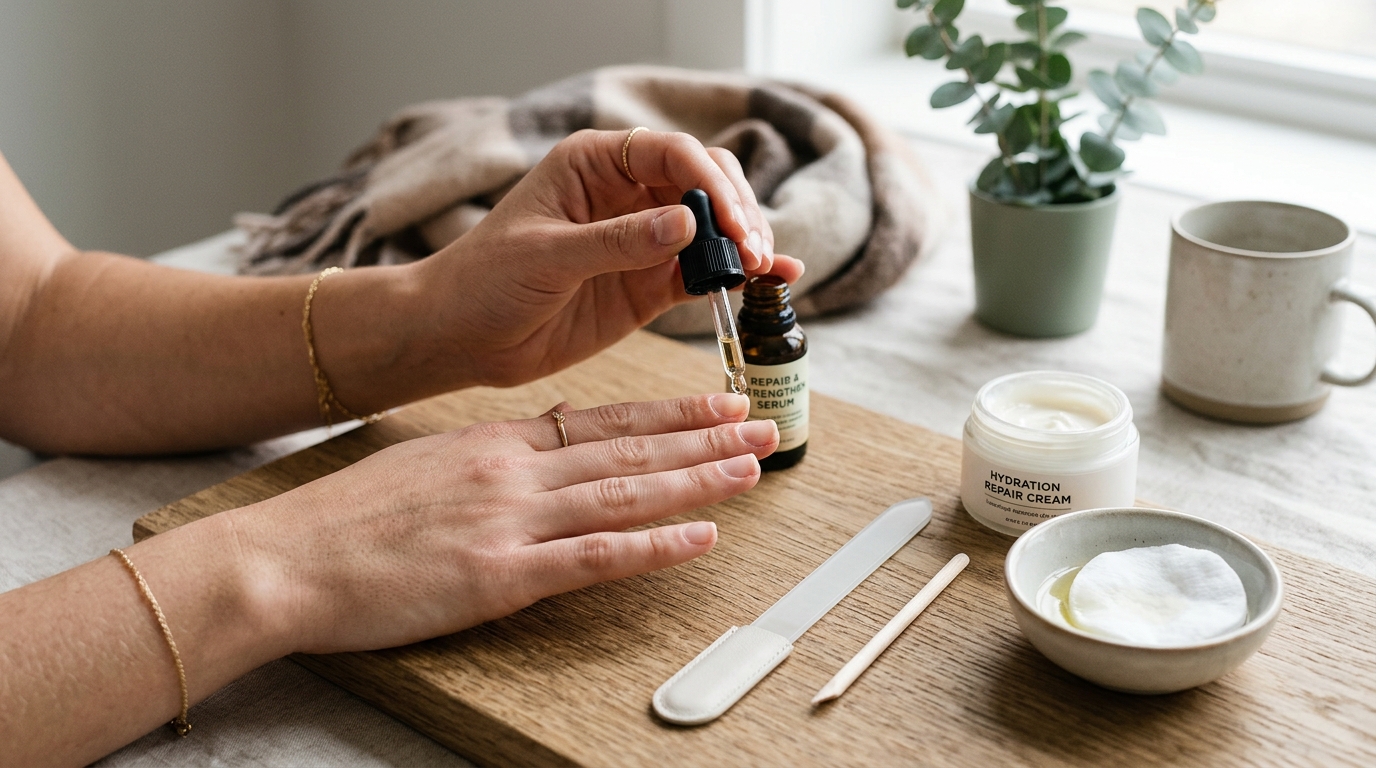
How to Repair Damaged Nails After Acrylics or Gel Polish: A Step-by-Step Guide
We’ve all been there. You sit at the manicure desk, dreaming of sleek, glossy extensions that make your hands look like they belong on a magazine cover. Fast-forward a few weeks, and it’s time to take them off. But instead of smooth, healthy tips under that gel or acrylic layer, you’re left looking at thin, peeling, bendy nails that feel tender to the touch. It’s enough to make anyone panic! Did you just ruin your natural nails forever?
Take a deep breath: the answer is no. While post-acrylic or post-gel damage feels frustrating, your nail beds are remarkably resilient. Think of your natural nails like skin after a mild sunburn—they’re raw, dehydrated, and craving a little extra tender loving care. With the right routine, a splash of patience, and targeted nourishment, you can restore your nails to their strong, shiny, natural glory. Here is your ultimate, step-by-step guide to repairing damaged nails after acrylics or gel polish.
—
Why Do Nails Suffer After Gel and Acrylic Enhancements?
To fix the damage, it helps to understand what actually caused it in the first place. Contrary to popular belief, it’s rarely the gel or acrylic formula itself that wrecks your natural nail plate. Most of the destruction happens during two critical phases: prep work and removal.
The Chemical Breakdown: What Rough Removal Does
When you go to a salon or try a DIY removal at home, the goal is to break down tough polymers. This usually involves prolonged soaking in pure acetone or electric filing (e-filing). Acetone is a heavy-duty solvent that strips away every drop of moisture and natural oil from your nail plate and surrounding skin. Worse yet, if enhancements are ripped, scraped, or pried off prematurely, they strip away the topmost layers of your natural keratin in the process. Imagine tearing duct tape off a sheet of fragile paper—that’s essentially what happens when acrylic is forced off your nail.
Moisture Depletion and Keratin Damage
Your nails are composed of layered sheets of a protein called keratin. Gel manicures block oxygen and light from reaching the nail plate, while aggressive surface buffing thins down those keratin layers. By the time the enhancement comes off, your nails are thoroughly dehydrated, structurally weakened, and vulnerable to every bump and snag.
—
Recognizing the Signs of Post-Acrylic Nail Damage
Nail damage isn't always identical for everyone. Depending on how long you wore enhancements and how they were removed, your nails might show a mix of symptoms.
Thin, Peeling, and Bendy Nails
Do your nails bend backward when you try to open a soda can? Are the tips splitting into delicate, paper-thin layers like onion skin? Extreme flexibility and peeling are clear signs that the structural integrity of your keratin has been compromised.
Discoloration, Ridges, and White Spots
You might notice chalky white patches scattered across your nail plates. Known as keratin granulations, these spots occur where layers of protein were stripped away during polish removal. Vertical ridges and yellowish discoloration are also common signs of severe moisture loss and surface trauma.
—
Immediate First-Aid Step: Take a Complete Enhancement Break
Before dipping into treatments, let's establish rule number one: give your nails a breather.
It’s tempting to rush back to the salon and slap on another set of gels just to hide the damage. But placing heavy chemicals or extensions over compromised nail beds is like running a marathon on a sprained ankle—it only delays healing and sets you up for worse injuries. Commit to a nail "detox" for at least 4 to 6 weeks. Give your natural nail bed time to rebuild its strength from the base up.
—
Step-by-Step Guide to Repairing Your Natural Nails
Now that you've hit the pause button on enhancements, it’s time to start the rehabilitation process. Follow this simple daily and weekly routine to jumpstart recovery.
Step 1: Trim, File, and Shape (Gently!)
When your nails are thin and damaged, long tips are your worst enemy. Longer nails act like levers; any slight bump will cause them to bend or snap right at the sensitive nail bed.
- Keep them short: Clip your nails down so they align closely with the tips of your fingers.
- Ditch metal files: Metal files and coarse emery boards are too abrasive for compromised nails.
- File in one direction: Never saw back and forth! File gently from the outer edge toward the center in smooth, single-direction strokes.
Choosing the Right Grit File
Look for a high-grit buffer or a fine glass (crystal) nail file. Glass files smooth out microscopic jagged edges without causing delicate keratin layers to split or fray.
Step 2: Flood Your Cuticles with Daily Hydration
If you only take one piece of advice from this guide, let it be this: hydrate continuously. Your nails are desperately thirsty for lipophilic (oil-loving) moisture to regain their elasticity.
- Apply cuticle oil at least 3 to 4 times a day. Keep a rollerball on your desk, your nightstand, and in your handbag.
- Massage the oil not just into your cuticles, but into the entire nail plate and underneath the free edge.
Oils vs. Creams: What Your Nails Need
While rich hand creams are great for skin, essential oils penetrate the nail plate much more deeply. Look for oils rich in jojoba oil, sweet almond oil, and vitamin E. Jojoba oil is uniquely effective because its molecular structure is small enough to pass through keratin layers, carrying deep hydration straight where it's needed.
“ +------------------+----------------------------------+------------------------------------+ | Product Type | Best Used For | Key Ingredients to Look For | +------------------+----------------------------------+------------------------------------+ | Cuticle Oil | Deep keratin hydration | Jojoba oil, Vitamin E, Almond oil | | Hand Cream | Surface skin moisture & barrier | Shea butter, Ceramides, Glycerin | | Keratin Serum | Protein structural repair | Hydrolyzed keratin, Peptides | +------------------+----------------------------------+------------------------------------+ “
Step 3: Integrate Keratin and Strengthening Treatments
Once your nails are clean and oiled, apply a targeted restorative treatment.
- Keratin Serums: These water-based treatments bond with your natural nail protein to patch up microscopic cracks and rough patches.
- Breathable Polish Base: Use a nutrient-rich ridge filler or treatment base coat containing bamboo extract or calcium. This adds a light physical shield over fragile nails without smothering them.
Step 4: Protect Your Hands During Daily Tasks
You’d be surprised by how much damage everyday chores inflict on healing nails. Water is actually a major enemy of weakened nails—keratin absorbs water easily, causing the nail to expand, and as it dries, it contracts. This constant expanding and shrinking weakens the internal bonds of the nail.
- Wear rubber gloves: Always put on gloves when washing dishes, cleaning with household detergents, or gardening.
- Avoid using nails as tools: Stop picking at stickers, opening pop-cans, or scraping surfaces with your fingernails. Use fingertips or tools instead!
—
Feeding Your Nails: Nutrition and Internal Care
Topical treatments work wonders, but true cell regeneration happens from the inside out. Remember, the damaged portion of your nail can't magically heal itself; it has to grow out while healthy new cells take its place.
Essential Vitamins for Nail Regeneration
Support your body's natural keratin factory by focusing on vital nutrients:
- Biotin (Vitamin B7): Known to improve nail thickness and reduce splitting.
- Zinc: Crucial for cellular growth and repair. A lack of zinc can cause white spots and brittle texture.
- Iron: Helps deliver oxygen to your nail matrix. Low iron levels lead to spoon-shaped or flat nails.
- Collagen Peptides: Supplies essential amino acids necessary for building resilient connective tissues.
The Power of Hydration and Protein
Drink plenty of water throughout the day to keep growing tissues hydrated. Additionally, ensure your daily meals contain lean proteins like eggs, poultry, beans, and nuts. Since nails are made almost entirely of protein, giving your body adequate building blocks speeds up healthy growth.
—
Common Mistakes to Avoid While Healing
When you're eager to fix damaged nails, it's easy to overdo it or make missteps that delay progress. Here are a few traps to stay clear of:
- Peeling off leftover polish: If you see a little patch of gel or base coat clinging on, do not peel or pick at it! You will peel off a layer of your natural nail along with it.
- Using aggressive "Nail Hardeners": Be cautious with classic nail hardeners packed with formaldehyde. These formulas cross-link proteins to make nails instantly rock-hard, but they remove all flexibility. Hard, rigid nails snap easily when bumped! You want flexible strength, not brittle rigidity.
- Over-buffing the surface: Buffing away ridges might make your nails look smooth short-term, but it thins out an already fragile nail plate. Keep buffing to an absolute minimum.
—
How Long Does It Take for Damaged Nails to Grow Out?
Patience is key here. On average, fingernails grow at a rate of roughly 3 millimeters per month. This means it takes about 4 to 6 months for a nail to completely grow out from the cuticle matrix to the tip.
You won’t see instant structural changes on the damaged tips, but within 2 to 3 weeks of consistent care, you’ll notice that the fresh growth coming in at your cuticle base looks smoother, thicker, and visibly healthier. Celebrate those small wins!
—
Safe Alternatives While Waiting for Recovery
Just because you're giving your nails a break from acrylics doesn't mean your hands have to look bare or unpolished if you prefer a finished look.
- 10-Free Breathable Polishes: Traditional nail polishes that are free from harsh chemicals (like toluene, formaldehyde, and DBP) are safe to use once your nails feel less tender.
- Nail Tint Serums: Sheer, tinted nail strengtheners add a soft pink or nude glow while treating damage beneath the surface.
- Focused Manicures: Spend your usual beauty salon budget on luxury "Russian-style" or dry manicures that focus purely on skin hydration, clean cuticle care, and natural nail shine.
—
Conclusion
Experiencing weak, paper-thin nails after taking off gel polish or acrylics can feel frustrating, but it isn't permanent. Your nails are constantly regenerating! By cutting them short, flooding your cuticles with nourishing jojoba oil, shielding them from water damage, and eating a protein-rich diet, you give your body everything it needs to rebuild. Stick to this simple rehabilitation routine, and in just a few months, you'll be showing off strong, smooth, effortlessly beautiful natural nails.
—
Frequently Asked Questions (FAQs)
1. How long should I wait before getting acrylics or gels again?
It's best to wait until the damaged portion of your nail has completely grown out, which usually takes between 3 to 6 months. Reapplying acrylics over weak, thin nails risks further damage, tearing, and potential fungal infections due to trapped moisture.
2. Is cuticle oil really necessary, or is regular hand lotion enough?
Cuticle oil is far more effective for nail health. Hand lotions contain large molecules designed to sit on the surface of the skin to lock in water. Cuticle oils—especially those containing small-molecule carrier oils like jojoba—can actually penetrate the dense keratin of the nail plate to restore deep flexibility.
3. Why do my nails feel sore or hurt after removing acrylics?
Soreness usually occurs when the nail plate has been filed down too thinly, exposing the sensitive, nerve-rich nail bed underneath. It can also happen if extensions were ripped off forcefully. Keep your nails short, avoid hot water, and apply soothing oils until the soreness subsides over a few days.
4. Can I use press-on nails while repairing my damaged nails?
It is recommended to avoid press-on nails during the initial healing phase. Press-on glues and adhesive tabs still require soaking or peeling to remove, which can tear off delicate keratin layers on nails that are already thin and compromised.
5. Will taking biotin speed up my nail recovery?
Biotin supports healthy new cell growth at the nail matrix (where the nail is formed under your skin), but it will not fix the damaged nail that has already grown out. Consistent biotin intake over 2 to 3 months can help ensure that the new nail growing in is stronger and thicker.
Post Comment