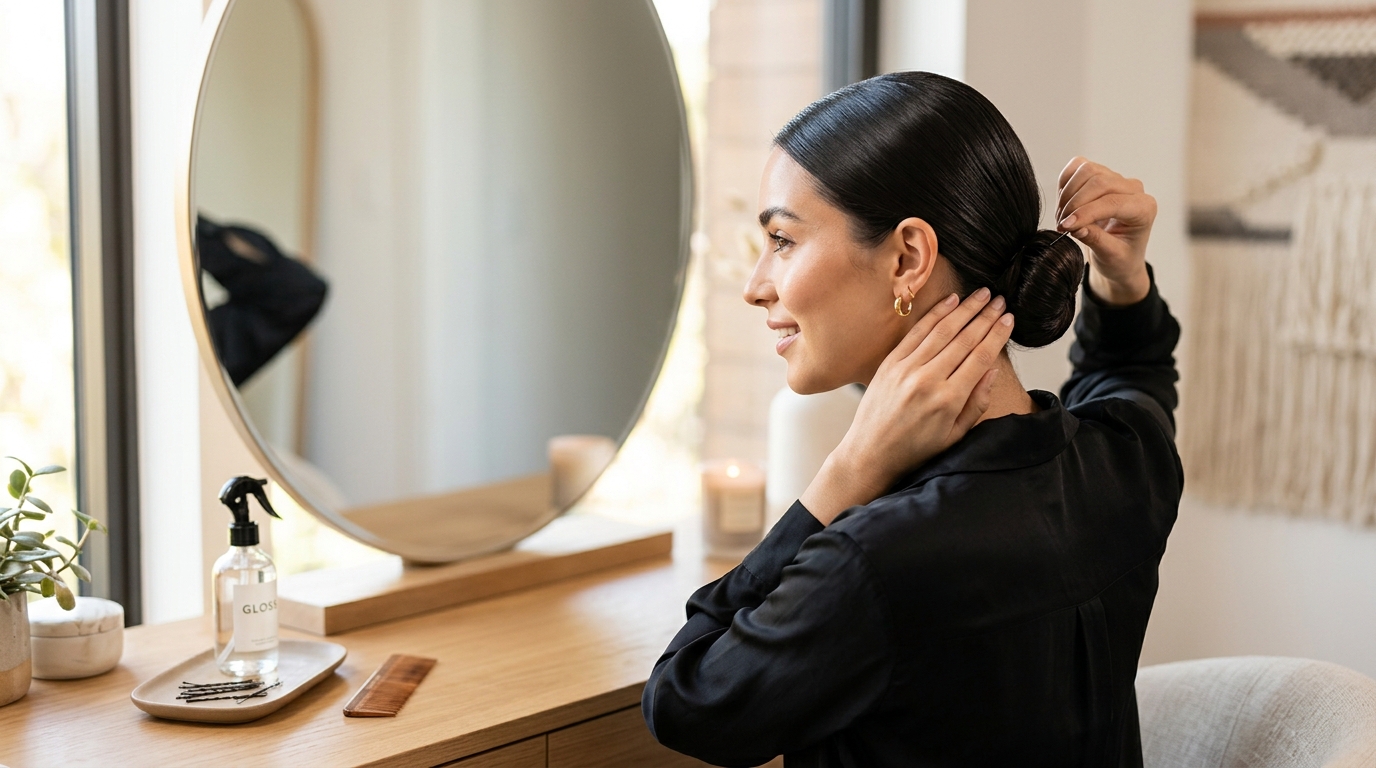
How to Achieve the Perfect Sleek Bun: A Step-by-Step Guide
Have you ever looked at a photo of a supermodel off-duty or a sleek executive commanding a boardroom and wondered how on earth their hair looks so perfectly polished? No flyaways, no frizz, just pure, glass-like shine. Enter the sleek bun—the ultimate hair cheat code. Whether you’re running late for a zoom meeting, heading to a high-profile dinner, or just trying to stretch out your hair-wash day for one more 24-hour cycle, this hairstyle is your absolute best friend. It’s effortlessly chic, incredibly versatile, and shockingly easy to achieve once you know the insider secrets. Let’s dive into how you can master this iconic look at home, transforming your messy mane into a sculpted masterpiece.
The Magic of the Sleek Bun: Why It’s the Ultimate Go-To
There is a reason the sleek bun has taken the beauty world by storm and refused to let go. It is the perfect marriage of practicality and high fashion. In a world where we are constantly on the move, we need hairstyles that can keep up with our chaotic schedules without requiring a personal glam squad.
The beauty of the sleek bun lies in its structure. It pulls the hair away from your face, instantly highlighting your cheekbones, jawline, and whatever gorgeous makeup look you’ve decided to rock today. It’s like an instant, non-surgical facelift that costs absolutely nothing.
From Gym to Gala: The Versatility Factor
Think about it: what other hairstyle can you wear to an intense hot yoga session, a casual brunch with friends, and a black-tie wedding without changing a single thing? The sleek bun is a chameleon.
Pair it with oversized sunglasses and a trench coat, and you’ve got that coveted "clean girl" aesthetic. Throw on some chunky gold hoops and a blazer, and you’re ready to close business deals. It adapts to your outfit, making you look intentional and put-together, even if you put the whole look together in under ten minutes.
Bad Hair Day? Not Anymore!
We’ve all been there. It’s day four after your last blowout, your roots are starting to look a little slick (and not in a good way), and you just don't have the energy for a full wash-and-dry routine.
Instead of fighting your hair's natural oils, why not work with them? The sleek bun actually thrives on second- or third-day hair. Those natural oils provide the perfect grip and base shine, meaning you’ll use less product and get a much tighter, smoother finish. It’s the ultimate way to turn a bad hair day into a style statement.
—
Essential Tools and Products You’ll Need
Before we start styling, we need to gather our tools. Think of this like baking a cake—you wouldn’t start mixing ingredients without checking the pantry first, right? Having the right tools on hand is the difference between a bumpy, loose mess and a pristine, glass-like finish.
“ +--------------------------+---------------------------------------------+ | Tool/Product | What It Does | +--------------------------+---------------------------------------------+ | Boar Bristle Brush | Smooths out bumps and distributes oils | | Styling Gel / Wax Stick | Tames flyaways and locks the style in place | | Fine-Tooth Rat Tail Comb | Creates a razor-sharp, clean part | | Seamless Hair Ties | Secures the ponytail without causing damage | | Bobby Pins | Tucks away loose ends and anchors the bun | +--------------------------+---------------------------------------------+ “
The Right Brush Makes All the Difference
If you’re trying to get a sleek bun using a standard detangling brush, you’re playing on hard mode. The real secret weapon of professional hairstylists is a boar bristle brush (or a vegan synthetic equivalent).
These brushes have densely packed, stiff bristles that lay the hair fibers completely flat. While a regular brush just moves through your hair, a boar bristle brush acts like a steamroller, smoothing out every microscopic bump and distributing your hair's natural oils from root to tip for that coveted glossy sheen.
The Styling Products: Gels, Waxes, and Oils
To get that mirror-like shine, you need a solid styling product.
- Hair Wax Sticks: These are incredible for targeted application. You can swipe them directly onto your hair to tame stubborn baby hairs around your hairline without making your hands sticky.
- Strong-Hold Gel: Look for an alcohol-free formula. Alcohol dries out your hair and leads to that dreaded crunchy, flaky white residue by the end of the day. We want sleek and wet-looking, not stiff and flaky.
- Lightweight Hair Oil: A quick drop of hair oil applied to the ends of your hair before twisting it into a bun adds a gorgeous, healthy glow and keeps your ends hydrated.
Hair Ties and Bobby Pins: The Silent Heroes
Don’t underestimate the power of your hardware. You’ll want to use seamless nylon hair ties that match your hair color. Avoid those old-school hair ties with the metal clasps, as they will snag and break your hair strands when you pull them tight.
For bobby pins, look for the ones with rubberized tips. They grip the hair much better and won't scratch your scalp as you secure your bun.
—
Step-by-Step: Crafting the Perfect Sleek Bun
Now that you’ve gathered your toolkit, it’s time to get down to business. Follow these steps carefully, and don't rush the smoothing process. Rome wasn't built in a day, and neither is the perfect sleek bun!
Step 1: Prep and Detangle Your Canvas
First things first, you need to brush out any tangles. Trying to slick back tangled hair is a recipe for bumps, lumps, and frustration.
Start brushing from your ends and work your way up to the roots to minimize breakage. If your hair is freshly washed and a bit too clean (meaning it’s slippery and flyaway-prone), spray a light mist of water or leave-in conditioner to give it some weight and grip.
Step 2: Sectioning and Parting (Middle vs. Side vs. No Part)
Decide on your vibe.
- The Middle Part: This is the classic, ultra-modern look. It’s symmetrical, sharp, and frames the face beautifully.
- The Side Part: Think old-school Hollywood glamour. It’s dramatic, elegant, and perfect for evening events.
- No Part (Slicked Straight Back): This gives off an athletic, high-fashion runway energy.
Using the metal tail of your rat-tail comb, trace a clean line from your hairline back to the crown of your head. A straight part is crucial here; even a slightly crooked part will throw off the symmetry of the entire look.
Step 3: The First Sleek-Down (The Base Ponytail)
Here is where the magic happens. Do not try to make the bun right away. The secret to a long-lasting sleek bun is securing a perfect ponytail first.
Apply a generous amount of your styling gel or wax stick to your roots, focusing on your hairline, the crown, and the nape of your neck. Take your boar bristle brush and begin sweeping your hair back toward where you want your bun to sit.
The Dual-Ponytail Trick for Extra Thick Hair
If you have incredibly thick or heavy hair, securing it all in one go can be a nightmare. Try this: split your hair horizontally into two sections (top and bottom).
Slick back the bottom section into a ponytail first and secure it. Then, apply product to the top section, brush it back to meet the first ponytail, and secure them both together with a second hair tie. This distributes the weight and prevents your ponytail from sagging throughout the day.
Step 4: Securing the Base
Once your hair is brushed completely smooth with zero bumps, hold the ponytail tightly against your head with one hand. Use your other hand to wrap your seamless hair tie around the base.
Make sure it is snug, but not so tight that it causes pain. If your forehead feels like it’s being pulled back into the next decade, loosen it just a tiny bit. Comfort is key!
Step 5: Twisting and Wrapping the Bun
Now that your ponytail is locked in, you have a few options for the bun itself.
For a classic, clean look, twist the ponytail tightly until it begins to coil around itself. Guide the coil around the base of your hair tie to create a neat, cinnamon-roll shape.
If you want a more modern, edgy look, leave the last inch or two of your hair ends sticking out of the bun rather than tucking them away. This creates a cool, spiky 90s-inspired silhouette that is highly trendy right now.
Step 6: Locking It in Place
Take your bobby pins and slide them into the base of the bun, catching both the hair in the bun and the hair flat against your scalp. Secure them in a north, south, east, and west pattern to lock the bun from all angles.
To finish, take a clean toothbrush (or an edge brush) and apply a tiny bit of gel or hairspray to it. Gently sweep over your baby hairs and any stubborn flyaways around your ears and the back of your neck. This is like applying the topcoat to a fresh manicure—it seals the deal.
—
Pro Tips for Different Hair Types
Hair is not one-size-fits-all, and neither is the sleek bun. Depending on your hair texture, you might need to tweak your approach slightly to get the best results.
Taming Thick and Curly Textures
If you have gorgeous coily or curly hair, your main focus will be moisture and control.
Don't try to slick your hair dry; it will absorb the product instantly and puff up. Instead, style your hair while it is damp. Use a heavy-duty edge control or a gel with a strong hold and moisturizing ingredients like shea butter or argan oil. This keeps your curls hydrated while ensuring the hair lies completely flat.
Adding Volume to Fine or Thin Hair
If your hair is on the finer side, a sleek bun can sometimes make your hair look a little sparse, or make your bun look like a tiny cocktail onion.
To combat this, don't slick the hair too tight to your scalp. You can also use a foam hair donut or a bit of texturizing spray in your ponytail before twisting it. Backcomb (tease) the ponytail slightly before wrapping it into a bun to create the illusion of a much thicker, fuller bun.
—
How to Avoid Damage and Hair Loss
While we love a sleek bun, we have to talk about hair health. Pulling your hair back too tightly on a daily basis can lead to a condition called traction alopecia—which is gradual hair loss caused by constant pulling on the hair follicles.
- Give Your Scalp a Break: Avoid wearing a super-tight sleek bun multiple days in a row. Let your hair down on weekends or opt for a loose claw-clip style.
- Never Sleep in a Sleek Bun: Always take your hair down before bed. Sleeping with tight hair ties causes friction and breakage as you toss and turn.
- Use Scalp Serums: Keep your hair follicles happy by massaging a nourishing scalp serum or rosemary oil into your hairline on your wash days to promote healthy blood flow and hair growth.
—
Maintaining the Look All Day (And Night)
You’ve put in the work, so let’s make sure it lasts! If you find a few flyaways popping up halfway through the day, don’t panic. Keep a travel-sized hair wax stick or some hair gel in your bag for quick touch-ups.
If you’re planning on dancing the night away, mist your entire head with a high-shine finishing spray. This locks in the moisture, adds an extra layer of glass-like reflection, and ensures your sleek bun stays absolutely flawless from morning coffee to midnight cocktails.
—
Conclusion
Mastering the perfect sleek bun is a total game-changer for your beauty routine. It’s the ultimate blend of elegance, simplicity, and practicality. By using the right tools—like a boar bristle brush and an alcohol-free gel—and taking your time to secure a smooth base ponytail first, you can easily replicate this high-fashion look at home. Remember to listen to your scalp, give your hair some breathing room between tight styles, and most importantly, have fun experimenting with different parts and heights. Now go grab your brush and slay the day!
—
Frequently Asked Questions
Can I do a sleek bun on freshly washed hair?
Yes, you absolutely can! However, freshly washed hair is often very soft and slippery, which can make it harder to get a bump-free finish. If your hair is clean, apply a generous amount of styling cream or gel to give it some grip before brushing it back.
Will styling gel damage my hair if I use it every day?
Using gel daily won't necessarily damage your hair, but it can lead to product buildup on your scalp, which can clog hair follicles. To avoid this, make sure to use a clarifying shampoo once a week to deeply cleanse your scalp and remove any leftover residue.
How do I prevent my hair from looking greasy instead of sleek?
The key is product placement and selection. Use high-shine gels or wax sticks primarily on your roots and the surface of your hair, rather than saturating the entire strand. Also, avoid heavy oils if you have fine hair, as they can quickly weigh down your look and make it appear greasy rather than polished.
What is the best way to sleep with a sleek bun if I want to keep it for the next day?
If you must sleep in it, swap your regular hair tie for a soft silk or satin scrunchie to minimize tension. Wrap your head in a silk scarf or sleep on a satin pillowcase to reduce friction and prevent flyaways from popping up overnight.
How do I get rid of the bumps at the back of my head when pulling my hair up?
The trick is to tilt your head back slightly while brushing the hair into a ponytail. When you look straight ahead again, the skin and hair at the nape of your neck will naturally tighten, smoothing out any loose bumps or sagging sections.
Post Comment