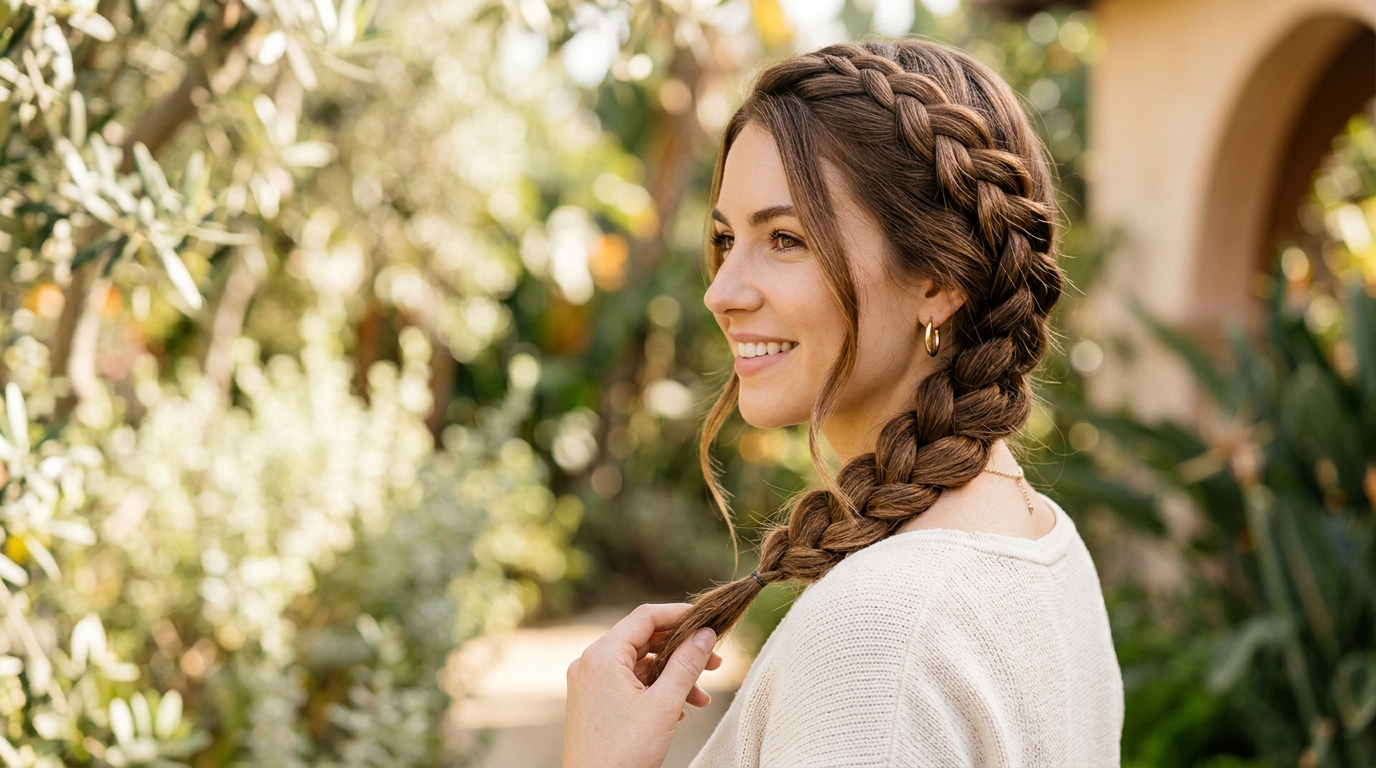
10 Easy Braided Hairstyles Perfect for Beginners
Have you ever stared at a gorgeous, intricate braid on your feed and thought, “Yeah, my fingers could never do that”? It’s a totally normal feeling. Braiding can sometimes feel like trying to solve a Rubik’s cube with your hands behind your back. But here is a little secret: those jaw-dropping styles aren't as complicated as they look. In fact, once you learn a few basic finger movements, you can create gorgeous, head-turning styles in under five minutes.
Whether you’re rushing out the door for a morning meeting, heading to a music festival, or just trying to survive a bad hair day, we’ve got your back. Let's demystify the art of braiding with ten super-simple, beginner-friendly braided hairstyles that look incredibly chic. Grab your hair ties, shake out your hands, and let’s dive in!
—
Why Braids Are the Ultimate Hair Hack in 2026
In 2026, the beauty world is all about effortless, low-maintenance luxury. We are moving away from heavy heat styling and embracing natural textures and protective styles. That’s where braids come in as the ultimate cheat code. They are the perfect blend of fashion and function.
Not only do braids protect your ends from daily wear and tear, but they also lock in moisture and save you from the scorching heat of curling irons. Plus, let’s be honest: there is no better cover-up for third-day unwashed hair than a stylish braid. The natural oils in your hair actually give it the grip and texture needed to keep a braid in place. So, if you’ve skipped a hair wash day (or two), congratulations—you are in the perfect position to start braiding!
—
Essential Tools for Your Braiding Toolkit
Before we start crossing strands, let’s gather our supplies. You don't need a professional salon setup, but having a few key tools on hand will make your life infinitely easier. Think of these as your magic wands.
- A High-Quality Detangling Brush: Trying to braid tangled hair is a recipe for frustration. Always brush your hair thoroughly before you start.
- A Rattail Comb: This is your best friend for creating clean, straight parts.
- Clear Elastic Bands: These are perfect because they blend seamlessly into any hair color and don't bulk up the ends of your braids.
- Bobby Pins: Look for pins that match your hair color to discreetly secure loose layers.
- Dry Shampoo or Texturizing Spray: If your hair is freshly washed and slippery, a quick spray of texture mist will give your strands the "grit" they need to stay put.
- A Lightweight Hair Oil: A tiny drop smoothed over your finished braid will tame flyaways and add a gorgeous, healthy shine.
—
1. The Classic Three-Strand Braid
If you can tie your shoes, you can do this braid. It is the absolute foundation of all braiding. Master this, and you’ve unlocked the gateway to every other style on this list. Think of it as the comforting bowl of warm soup of the hair world—simple, reliable, and always classic.
How to Nail the Basics
First, brush all your hair back or to one side. Divide your hair into three equal sections: left, middle, and right. Take the left section and cross it over the middle section. Now, that left section is your new middle. Next, take the right section and cross it over the middle section.
Repeat this alternating pattern: left over middle, right over middle, left over middle. Keep your tension firm but not painfully tight. Once you reach the ends, secure it with a small elastic. It’s that simple!
—
2. The Sleek Side Braid
Once you have mastered the classic three-strand braid, it’s time to give it a stylish twist. The side braid is incredibly chic, giving off effortless Parisian vibes. It’s the perfect look for running errands or sitting through a video call.
To achieve this, sweep all of your hair over one shoulder. Divide it into three sections right below your ear and begin your classic three-strand braid. Because you are braiding to the side, it’s much easier to see what you are doing in the mirror. Once you reach the bottom, secure it with an elastic. Gently pull at the outer loops of the braid—a technique called "pancaking"—to make the braid look twice as thick and wonderfully lived-in.
—
3. The Romantic French Braid
The French braid is a classic for a reason. It looks elegant, keeps every single hair out of your face, and works beautifully on both medium and long hair. While it might look intimidating, it’s just a regular three-strand braid that gathers more hair as it travels down.
Overcoming the "Finger-Tangle" Struggle
The trick to a French braid is managing your hands. Start at the crown of your head by sectioning off a small, three-inch chunk of hair. Divide this chunk into three sections. Cross the left strand over the middle, then the right strand over the middle, just like a normal braid.
Before you make your next cross, scoop up a small section of loose hair from the left side of your head and add it to the left strand. Now, cross that combined strand over the middle. Do the same on the right side: grab a little loose hair, add it to the right strand, and cross it over. Continue this "scoop and cross" rhythm down your scalp. Once you run out of loose hair at the nape of your neck, finish it off with a standard three-strand braid.
—
4. The Chunky Dutch Braid
If the French braid is sweet and romantic, the Dutch braid is bold and modern. Often called the "reverse French braid," this style sits on top of your hair like a beautiful, three-dimensional crown. It is fantastic for creating the illusion of thick, voluminous hair.
Why It’s the "Inside-Out" Magic Trick
The secret to the Dutch braid is incredibly simple: instead of crossing the strands over the middle, you cross them under the middle.
Start at the crown of your head with three small sections. Take the left strand and cross it under the middle strand. Take the right strand and cross it under the middle strand. Just like the French braid, begin adding loose hair to your side strands before each cross—just remember to always pass them underneath the center strand. This pushes the braid upward, making it pop out beautifully against your head.
—
5. The Elegant Fishtail Braid
The fishtail braid looks incredibly intricate, like a beautiful piece of woven tapestry. Your friends will think you spent hours on it, but here is the secret: it only uses two strands of hair! It is highly repetitive, making it the perfect braid to do while zoning out to your favorite podcast.
The Secret to Perfect Micro-Strands
Divide your hair into two large, equal sections. Take a tiny, pencil-thin strand of hair from the outer edge of the left section. Cross this tiny strand over to join the right section. Now, take a tiny strand from the outer edge of the right section and cross it over to join the left section.
That is the entire process! Just keep crossing tiny outer pieces over to the opposite side. The smaller the strands you use, the more detailed and stunning your fishtail will look. Once you reach the end, secure it with an elastic and gently pull the edges to give it a relaxed, boho-chic finish.
—
6. The Quick Half-Up Crown Braid
Want to keep your hair flowing down your shoulders but still want it out of your face? The half-up crown braid is your new best friend. It takes less than three minutes and gives off instant fairy-tale princess vibes.
Start by parting your hair down the middle. Grab a small section of hair near your right temple and braid it into a simple three-strand braid, securing the end with a clear elastic. Do the exact same thing on the left side. Now, take both braids, pull them to the back of your head so they meet in the middle, and tie them together with a small elastic. You can hide the elastic by wrapping a tiny strand of hair around it, or simply leave it as is for a clean look.
—
7. The Playful Double Space Bun Braids
If you are looking for something fun, youthful, and perfect for warm weather, double space bun braids are a must-try. This style is incredibly popular for weekend brunches, workouts, or festival days.
First, split your hair down the center into two equal pigtails. Secure each pigtail high on your head with a hair tie. Now, braid each pigtail into a classic three-strand braid and secure the ends. Gently pancake the braids to add some volume. Finally, wrap each braid around its base to create a textured, rose-like bun, and secure it with a few bobby pins. It’s cute, quirky, and keeps your neck cool all day long.
—
8. The Effortless Bubble Braid (The Ultimate Cheat Code)
Okay, let’s be honest: sometimes your fingers are just too tired to weave strands together. Enter the bubble braid. While it isn't technically a traditional braid, it gives you that gorgeous, segmented look with absolutely zero weaving required. It is the ultimate beginner cheat code.
Pull your hair back into a sleek ponytail. Moving down the length of your ponytail, place another clear elastic band every two to three inches. Once all your elastics are in place, use your fingers to gently tug and puff out the hair between each elastic band. This creates a series of gorgeous, voluminous "bubbles" down your ponytail. It is high-fashion, incredibly fast, and looks amazing on everyone.
—
9. The Chic Braided Ponytail Wrap
A standard ponytail is great, but it can sometimes feel a little plain. You can instantly elevate your daily high pony into a red-carpet-worthy look with this simple braided wrap trick.
Gather your hair into a high, sleek ponytail and secure it tightly with a hair tie. Take a small, half-inch section of hair from the underside of your ponytail. Braid this small section into a tight, neat three-strand braid and secure it with a tiny elastic. Now, wrap this mini-braid around the base of your ponytail, completely covering your main hair tie. Tuck the end of the braid underneath the ponytail and secure it with a bobby pin. Just like that, you’ve turned a basic gym hairstyle into a sleek, sophisticated look.
—
10. The Boho Halo Braid
The halo braid looks like a gorgeous, angelic crown wrapping around your head. While advanced versions involve complex Dutch braiding all the way around your scalp, this beginner-friendly shortcut gives you the exact same look with a fraction of the effort.
Part your hair down the middle and create two low pigtail braids at the nape of your neck. Secure both braids with clear elastics. Take the right braid, bring it up and over the top of your head like a headband, and pin it securely in place near your left ear. Take the left braid, bring it up and over the top of your head in the opposite direction, overlapping the first braid, and pin it near your right ear. Tuck any loose ends underneath the braids to hide them. You are left with a stunning, regal halo that is perfect for weddings, dinners, or cozy days at home.
—
Pro Tips to Keep Your Braids Looking Fresh All Day
Now that you’ve mastered these styles, you want them to actually last. There is nothing worse than spending time on a beautiful braid only for it to fall apart by lunchtime. Here are a few golden rules to keep your styles locked in.
Taming those Pesky Flyaways
Baby hairs and flyaways are completely natural, but they can make a neat braid look messy. To keep things smooth, grab a clean, unused toothbrush. Spray the bristles with a medium-hold hairspray or dab a tiny bit of hair pomade onto them. Gently brush the toothbrush over your hairline and the length of your braid. The fine bristles will smooth down flyaways without making your hair look greasy or stiff.
Sleeping with Braids: The Satin Pillowcase Secret
If you want to prep your hair the night before, or if you want your beautiful braids to survive until tomorrow, invest in a satin or silk pillowcase. Traditional cotton pillowcases cause friction, which roughs up your hair cuticles and creates frizz. Satin allows your hair to glide smoothly as you toss and turn, keeping your braids intact and saving you precious time in the morning.
—
Wrapping It Up: Your New Go-To Style
Braiding is not a talent you are either born with or not; it is simply muscle memory. Like riding a bike or learning to play an instrument, your fingers just need a little time to get used to the rhythm. Don’t get discouraged if your first few attempts look a bit lopsided—that is all part of the process! Even a messy, imperfect braid has a wonderful, effortless charm to it.
So, grab your comb, put on your favorite show, and start practicing. Before you know it, you’ll be whipping up gorgeous, runway-ready braided styles in your sleep. Happy braiding!
—
Frequently Asked Questions (FAQs)
Can I braid wet hair?
It is generally best to avoid braiding your hair when it is soaking wet. Hair is at its weakest and most fragile state when wet, meaning tight braids can cause stretching, snapping, and breakage. Wait until your hair is at least 80% dry before styling.
How do I stop my braids from slipping out if I have very fine, silky hair?
Silky hair lacks the "grip" needed to hold braids. To fix this, prep your hair with a generous spray of dry shampoo, sea salt spray, or volume powder before you start braiding. This adds temporary texture, giving your hair the friction it needs to stay locked in place.
What is the absolute easiest braid for a complete beginner to start with?
The classic three-strand side braid is the perfect starting point. Because it is positioned on the side of your head, you can easily watch your hands in the mirror as you learn the basic cross-over movements.
How do I make my braids look thicker if I have thin hair?
The secret is "pancaking"! Once your braid is secured with an elastic, start from the bottom and gently pull outward on the outer loops of each section. This flattens the braid and spreads the hair out, instantly making it look twice as thick.
How long can I leave these beginner braids in my hair?
For loose, casual braids like the ones on this list, it is best to take them out before going to bed or after a full day of wear. Leaving them in for multiple days without proper care can lead to tangling and matting. Always detangle your hair gently after taking a braid down.
Post Comment